This topic contains sub-topics that address the common administrative tasks that are performed by Aptify administrators:
- Creating Alert Types
- Administering Query Timeout Values
- Archiving Transactional Data
- Administering Base Fields
- Administering Dashboards
- Using the Data Packing and Unpacking Wizards
- Creating Database Objects
- Administering Entity Bulk Operations
- Administering Filter Relationships
- Using the Filter Rules Service
- Administering the Generic Import Wizard
- Administering Metadata Wizards
- Administering Microsoft Word Templates
- Using the Object Viewer
- Administering Pending Changes
- Administering Record Templates
- Administering Scripts
- Administering the Viewing System
- Installing the Desktop Version of the Aptify Add-in for Microsoft Outlook
- Installing the Web Version of the Aptify Add-in for Microsoft Outlook
Creating Alert Types
The Alert Types service stores information about the available Alert Types in Aptify. When certain situations occur (for example, if a record has a pending change or when a person's credit status is on hold), an alert can be associated with the record to notify users so they can act appropriately. When an alert is in effect for a record, the Alerts icon turns red on the record's toolbar to notify all users that an alert exists for the record. A developer can write an object or use a script (such as a SQL statement) to define the logic which will trigger the alert.
Aptify includes one default Alert Type that is used in conjunction with the Pending Changes functionality (see Administering Pending Changes for details about this feature). See Using the Save as Pending Button for more information about how the record alert functionality works with this feature from a user's perspective.
Follow these steps to create an Alert Type record:
- Open a new record from the Alert Types service.
-
Enter a name for the Alert Type in the Name field.
The Default Importance, Display In Message Box, Display In Tool Tip, Allows Clearing, View, List, and Event Definition fields are reserved for future use.
- Specify the Icon from the Object Repository to use for this type of alert.
- If blank, Aptify uses the default application icon.
- Select the Alert Type's Scope.
- Global: The alert type applies to all entities within the Aptify system.
- Entity: The alert type applies to a specific entity.
- If you have selected Entity as the scope of the alert type, specify an entity in which you want to associate the alert type in the Entity ID field.
- If you want to specify a specific date range for when this alert type is available, enter a Start Date and an End Date in the field provided.
- Once an end date is reached, the Alert Type is no longer available, even if the Alert Type's Status is Active.
- Confirm that the Status drop-down menu is set to Active.
- If you want to disable the Alert Type, set the Status to Inactive.
- Specify the Rank for the Alert Type.
- The rank number indicates the order in which the Alert Type appears under the Alert List dialog.
- A lower number indicates a higher rank. In other words, an alert type with a rank of 0 is evaluated before a record with a rank of 1.
- Note that Alert Types with Scope set to Global always appear before Alert Types with Scope set to Entity no matter the rank of the entity level alert.
- If you want the information about an alert to display when a user first opens a record that has an associated alert of this type, enter a value of 1 in the Display Alert On Load field.
- The default value for this field is 0. However, users are still notifying of the alert by the activation of the Alerts icon in the record's toolbar. When the Alerts icon is red, an active alert exists for the record.
- The default value for this field is 0. However, users are still notifying of the alert by the activation of the Alerts icon in the record's toolbar. When the Alerts icon is red, an active alert exists for the record.
- If you have developed an object to define the behavior of this alert type, select the Component Plug In tab and enter the following:
- Locate the Object which defines the alert type by clicking the button to the right of the Object field.
- Enter the assembly's name for the alert type in the Assembly field.
- Enter the name of the class for the alert type in the Class field.
- If the behavior of the alert type is defined through a script (such as a SQL statement), select the Source Script tab and enter the following:
- Enter a name for the script in the Script Name field.
- Specify the script's type in the Script Type field. By default, Aptify includes a Script Type called Alerts to be used for these types of scripts. See About the Script Types Form for more information about script types.
- Enter the language of the script in the Script Language field. See the About the Script Type Languages Form for more information about coding languages.
- Enter the text of the script in the Script Text box.
-
Save and close the record.
Aptify users must close and reopen the Aptify application before a new Alert Type or any changes to an existing Alert Type take effect.
Administering Query Timeout Values
In environments where there are complex queries or queries of a dataset with a large number of records, there may be cases where the queries timeout after 30 seconds. This can occur with queries such as complex non-List views and approving large bulk orders. In Aptify, List Views have no timeout; the system executes the view and continues until finished or the operation is canceled.
Administrators can add a key in the config files to increase the length of the query timeout to address this issue. This key, Aptify.Framework.DataServices.Constants.QueryTimeOut, has a default value of -1, which disables the key and has Aptify timeout queries using the value in the SqlCommand.CommandTimeout SQL Server property.
The default value of the SqlCommand.CommandTimeout property is 30 seconds.
The following table lists the config files you should update and their default location, broken down by interface type.
| Interface Used | Config Files | Default location |
|---|---|---|
| Aptify Desktop client |
Startup.exe.config Aptify Shell.exe.config |
C:\Program Files\Aptify 6.0 on the database server |
| Aptify web interface |
Aptify Web web.config SOA web.config |
C:\inetpub\wwwroot\<AptifyWeb Sub-folder> on the web server. C:\inetpub\wwwroot\<AptifyWeb Sub-folder>\AptifyServicesAPI on the web server The AptifyWeb sub-folder is the location where the Aptify website files are stored on the web server. |
The key should be added to the config files in the following format:
<add key="Aptify.Framework.DataServices.Constants.QueryTimeOut" value="[Insert number of seconds]"/>
Follow these steps to update the config files to use this key:
- Log in to the server for the affected interface.
- Launch Aptify as a user with administrator privileges.
- Using a text editor, open the appropriate config files for editing
- Add the key shown above (specifying the desired number of seconds for the timeout) to the files.
- Save the config files.
- If updating the config files associated with the Desktop client, you need to:
- Update the Object Repository records for these config files to use the new versions to which you added the timeout attribute. See Updating Object Repository Objects for more information.
- The next time a user closes and reopens Aptify, the local computer's Object Repository service will automatically download the new versions of Startup.exe.config and Aptify Shell.exe.config from the repository.
- If updating the config files associated with the web interface, you need to recycle the app pool associated with the SOA user or restart IIS.
Archiving Transactional Data
As an organization uses the Aptify system, the amount of certain transactional data grows over time, such as Record History information. An organization may wish to archive older transactional information and remove it from the database server.
Aptify provides an archive tool to move Lists and Record History information from the Aptify database server to another server for safekeeping.
There are two services associated with the archive feature:
- Archive Types: This entity defines the type of information that can be archived. Aptify includes two Archive Types records in the standard product installation: one for archiving Lists and one for archiving Record History.
- With the Aptify release 7.4, a new archive type has been added for cleaning Error logs (ErrorLog).
- Archive Runs: This entity launches the archive process and stores information on previous archive operations for tracking purposes.
This topic covers the following sub-topics:
- Archiving Best Practices
- Archiving List and Record History Data
- Adding New Archive Type for Error Logs
- About the Archive Types Form
Archiving Best Practices
Aptify supports three archiving operations:
- Archive: This operation copies the selected data to the specified destination and then deletes it from the Aptify server.
- Copy: This option copies the selected data to the specified destination.
- Delete: This option removes the selected data from the Aptify server without copying it to another server. Aptify strongly recommends that you archive data rather than delete it.
When archiving data, Aptify recommends that you adhere to the following best practices:
- Establish a dedicated archive server that will store all of the data you remove from the Aptify server.
- Keep in mind that you cannot copy the same data to the same location more than once. For example, if you copy a set of data to a server and then attempt to archive the same data to the same location, the archive operation will fail. However, you can copy the same data to multiple, different locations as needed.
- When archiving information, the Culture and SQL Server Regional Settings for the users on both servers (that is, the Aptify production server and the server to which data is being archived) must match.
- An administrator should never archive Record History for Framework entities, since Aptify's Upgrade Tools may reference Record History to assist with the identification of client configurations. When archiving record history, exclude Framework entities by modifying the SQL with a WHERE clause: WHERE isframeworkentity = 0 )
- Note that the default Working Set Selection Criteria automatically excludes all Framework entities from Archive Runs, but an administrator can override the default criteria.
- In the event that you decide to override the default criteria, you should retain the "where entityid in (select id from APTIFY.dbo.entity where isframeworkentity = 0)" phrase in the SQL statement to ensure that Record History for Framework entities is not archived.
- To identify the set of entities that are flagged as Framework entities, create a view of the Entities service that filters on the IsFrameworkEntity field.
- Before archiving, set your database Recovery model to Simple. This is to prevent filling your SQL Log file with unnecessary entries:

Set the database back to Full recovery model once the operation is completed. - On the Execution and Results tab, set the batch size to 1000. This is to avoid filling the server memory with transactions that are not committed to the database.
- Do not check the box "Execute in a single transaction".
- Before running the tool, execute the archiving on your Test environment to confirm everything behaves as expected. If you encounter issues archiving large numbers of records, you may wish to break the archive process into smaller operation by running the tool multiple times.
- When running on a Production environment, perform the operation off-business hours.
Archiving List and Record History Data
This topic describes the steps necessary to archive data using the Archive Runs service.
Follow these steps to archive List or Record History data:
- If you are copying or archiving data to a new location, create or designate a destination database for storing the data. The destination database should be located on a SQL server on your network.
- Open a new record from the Archive Runs service.
- Only sa or system administrators (that is, members of the Aptify Administrators group who are also system administrators on the SQL server) can access the Archive Runs service and run an archive operation.
- The current date populates the Archive Date Create field automatically. The time is added when the record is saved and the archive operation begins.
- The name of the current user who opened the Archive Runs record appears in the Run By field automatically.
- Enter an Archive Type. This field links to the Archive Types service.
- There are two Archive Types by default: one for Lists and one for Record History.
- The Tables tab automatically populates with a list of tables based on the selected Archive Type.
- Select an Operation type from the drop-down menu.
- The Archive option indicates that the archive procedure will first copy the selected data to the destination server and then delete it from the Aptify server.
- The Copy option indicates that the archive procedure will only copy the selected data to the destination server. The data also remains on the Aptify server.
- The Delete option removes the selected data from the Aptify server without copying it to another server. Aptify strongly recommends that you archive data rather than delete it.
- Under the Tables tab, change the name of one or more Destination Tables, if necessary.
- The Destination Table identifies the name of the table in the destination server's database to which the archive data will be copied. The archive process can create this table within the destination database, if necessary.
- To change the name of a Destination Table, double-click an entry in the Table list and enter a new name for the Destination Table.
- Do not change the name of the Source Table.
- Do not change the Rows Affected value. This field is updated automatically during the Archive process.
- Click the Destination tab.
- Enter the name of the Server to which you want to copy the data.
- You can archive data to the SQL server that already hosts the Aptify database. This will remove the data from the Aptify system but the data will still take up disk space on the server.
- Aptify recommends that you archive data to a different server.
- Enter the name of the Database on the destination server to which you want to copy the data.
- You need to create this database on the destination server if it does not already exist, as described in Step #1 above. You can use Microsoft SQL Server Management Studio to create a new database.
- Select the Create Destination Tables (if necessary) option if you want Aptify to create the tables specified in the Tables tab in the destination database.
- This option is enabled by default and Aptify will create the destination tables if they do not already exist.
- Note that Archive and Copy operations will fail if you disable this option and the tables do not already exist in the destination database.
- Select a login method for the destination server. The selected login must have system administrator privileges on the SQL server to execute the archive operation.
- Select Integrated Security (Trusted) if you are a trusted user on the destination server who has system administrator privileges.
- Select SQL Server Security (Untrusted) if you are using an untrusted user account to perform the archive operation.
- If you select SQL Server Security (Untrusted), enter the untrusted user's User Name and Password in the fields provided.
- Note that this security information is only used to login to the destination server. This information is not stored in the Archive Run record or with the archived data.
- Click the Selection Criteria tab to create a SQL statement that defines the data to archive.
- The available criteria options vary based on the Archive Type.
- If you are archiving Lists, you can select records to archive using one or more of the following categories:
- List Types: You can select records to archive based on one or more List Types.
- List Security: You can select records based on one or more security types (Personal, Global - Read, Global - Read/Write, and/or System).
-
Date Created: You can select records based on the date on which the list was created (available options include before the specified date, after the specified date, on the specified date, and between two specified dates).
If you select multiple categories, these categories are separated with an AND operators by default. You can override this default behavior as necessary by manually modifying the Working Set Selection SQL statement.
- If you are archiving Record History, you can select records to archive using the following selection criteria:
- Entities: Specify one or more Entities whose Record History versions you want to archive. You can use the Select All and Unselect All buttons as necessary to select records. Note that Aptify Framework entities (such as Lists, Entities, Views, etc.) do not appear on this list. To archive these entities, you need to manually override the Working Set Selection Criterion.
- Keep at least one version for each entity: Select this option to keep the latest Record History version for each record in an entity. When this option is cleared, the system archives all Record History data for a record.
-
Date Created: You can select Record History versions based on the date on which the version was -created (available options include before the specified date, after the specified date, on the specified date, and between two specified dates).
- To enable a selection criterion, select the criteria check box and select one or more options from the list provided. A check mark appears next to each selected option.
- The Working Set Selection Criteria SQL statement updates automatically as you enable selection criteria.
- If you want to modify the SQL statement, select the Manual Override option and edit the Working Set Selection Criteria (SQL) field as necessary.
- Note that the default Working Set Selection Criteria automatically excludes all Framework entities from Archive Runs, but an administrator can override the default criteria.
- In the event that you decide to override default criteria, you should retain the "where entityid in (select id from Aptify.dbo.entity where isframeworkentity = 0)" phrase in the SQL statement to ensure that Record History for Framework entities is not archived.
- To identify the set of entities that are flagged as Framework entities, create a view of the Entities service that filters on the IsFrameworkEntity field.
- If desired, click the Comments tab and enter any information about the archive run that you want to save for future reference.
- Click the Execution & Results tab.
- If desired, specify a Batch Size. If you leave this field blank, the system uses a default Batch Size of 50.
- Records are broken into transaction batches for processing.
- The records in each batch are treated as one transaction. If the archive operation encounters a problem while processing a particular batch, all batches that have been processed up to that point are archived. Any records in the current batch that were processed before the failure occurred are rolled back to the pre-archive state.
-
If you want all records to be processed in a single transaction batch, select the Single Transaction option.
Aptify recommends that you leave the Single Transaction option disabled.
- Click the Execute Test Run button to review the results of your selection criteria.
- This option lets you see how many records will be affected before you commit to running the archive operation.
- This option lets you see how many records will be affected before you commit to running the archive operation.
- Make any necessary changes to the selection criteria based on the results of the test run.
- Click Save when you are ready to begin the archive operation.
- The Archive Status window appears and displays the progress of the archive operation.
- Close the Archive Status window when the archive operation is complete.
- The information from the Archive Status window appears under the Execution & Results tab.
- The Selection Criteria tab displays the SQL statement used to identify the records that were archived by this run.
- The Rows Affected column in the Tables tab displays the number of rows that were added to the listed tables.
- You cannot change any of the values on the Archive Run form.
- Close the Archive Runs record.
- If you archived lists, open the Lists service and confirm that the archived records no longer appear in the system.
- Access the destination server and confirm that the data has been copied to the database into the table you specified.
Adding New Archive Type for Error Logs
With the Aptify 7.4 release, a new archive type named Error Log is available for archiving the rows from the ErrorLog table in Aptify database to a designated database setup for archiving.
Follow the below steps to configure Error logs archive type in Aptify Smart Client:
- Log in to the Smart Client application and navigate to Framework->Archive Type service.
- Click Create New Record
- In the form enter the below details. Refer to the below screenshot.
Name: Enter the name for error log. For example: Error Log
Entity: Error Log
Archive Object: DataModules.AptifyArchive
Archive Class: Aptify.Framework.Archive.ErrorLog
GUI Object: DataModules.AptifyArchive
GUI Class: Aptify.Framework.Archive.ErrorLogControl
Archive Assembly: AptifyArchive
GUI Assembly: AptifyArchive - Save the record. Now use the new archive type in Archive Run Process.
About the Archive Types Form
This entity maintains the list of available data types that can be removed from the database server and archived on another server for safekeeping. Aptify provides two Archive Types: one for Lists and one for Record History.
Attachments Tab
The Attachments tab lists any files relevant to the Archive Types record.
General Tab
Name (Required)
The name of the Archive Type.
Description
A description of the Archive Type.
Entity
The name of the entity that corresponds to this type, if applicable. For example, the Lists type has Lists specified in the Entity field, but the field is blank in the Record History type since Record History is not entity specific.
Archive Object
The object in the Object Repository that contains the Archive Assembly and Class.
Archive Class (Required)
The class within the Archive Assembly that defines the archive functionality for this Archive Type.
Archive Assembly
The Archive name of the object specified in the Archive Object field.
GUI Object
The object in the Object Repository that contains the GUI Assembly and Class.
GUI Class
The class within the GUI Assembly that defines the Selection Criteria tab appearance for this Archive Type.
GUI License
The license value for the GUI Class, if applicable.
Archive Assembly
The name of the .NET assembly that contains the Archive Class.
GUI Assembly
The name of the .NET assembly that contains the GUI Class.
Allow Archive
When this option is selected, Archive Runs of this type support the Copy operation. Note that to support the Archive operation, both Allow Archive and Allow Delete must be selected.
Allow Delete
When this option is selected, Archive Runs of this type support the Delete operation. Note that to support the Archive operation, both Allow Archive and Allow Delete must be selected.
Administering Base Fields
When creating or modifying entities, table definitions often make use of similar fields. For example, any entity which stores address information includes fields to store ZIP Code, State, and phone number. These types of fields are most likely defined the same everywhere they appear.
In Aptify, base fields provide a method to create generic fields which are commonly used in multiple entities. Base field records define these generic fields by setting all the field characteristics and options. When defining new fields in an entity, the use of a base field defaults the new field to the characteristics of the generic field definition, providing a means for consistency across entities. Also, when you update a Base Fields record, all of the fields derived from that base field are also updated automatically.
Aptify provides a standard set of sample base fields that an organization can use as necessary. The sample base fields include the following:
- Typical address fields: Many of the address fields have multiple Base Fields records. Each of these records has a different set of default options, as described in the Base Field's Name field. For example, City-NoCategory-DefaultInView and City-NoCategory both define a City field but one has the DefaultInView option checked and the other does not.
- DateCreated: This non-updateable field stores the date on which a record was created.
- DateUpdated: This non-updateable field stores the date on which a record was last updated.
- WhoCreated: This non-updateable field stores the name of the user who created a record.
-
WhoUpdated: This non-updateable field stores the name of the user who last updated a record.
Since the DateCreated, DateUpdated, WhoCreated, WhoUpdated fields are non-updateable, they do not appear on system-generated forms. However, you can display these fields in a view. (Note that these Base Fields have the DefaultInView option cleared so they do not display in views by default.)
This topic covers the following sub-topics:
Defining Base Fields
Defining Base Fields is nearly identical to setting up fields when creating a new or updating an existing Entities record. The field characteristics and options are set up exactly the same way.
The fields on a Base Fields record are identical to the fields on an entity's Fields record. Therefore, see Defining Entity Fields for more information on the fields described in this section. You can also refer to About the Fields Form.
Follow these steps to define a new Base Field record:
- Open a new record from the Base Fields service.
- Assign a name to Base Field within the Name field and click the Tab key.
- The Display Name automatically defaults to the value of the Name field but may be modified.
- The Base Table field is grayed out because it is not applicable to base fields.
- Enter a Display Culture String, if you are using localization on your system.
- See Using Localization Administration for more information.
- If the field is a linked field, select the appropriate Linked Entity and Linked Field from the lists. Also, specify the Link Type (see Link Type for details).
- Configure the fields on the General tab, as necessary.
-
Base Field: If you are creating a new base field that is very similar to an existing base field, you can specify the existing base field to load its settings into the new record. Then, you can make the necessary modifications to differentiate this new Base Fields record.
- Note that unlike with standard fields, the new base field is not listed as a derived field of the original base field.
- SQL Server settings: Use these fields to define the field's data type and size.
- Currency fields: If creating a base field that uses the data type of money or smallmoney, configure the multi-currency fields as necessary. See Money Fields for details.
- Width: Defines the field's default column width in a view in pixels.
- Category: Defines the field's category. For generated form, the field appears under a tab labeled with the category's name.
- Default Value: The default value that appears for this field when loading new records.
- Extended Type: Select an applicable field type from the drop-down list to enable additional functionality. See Extended Attribute Fields for more information.
-
Parent Linked Value: If this field is in a sub-type entity and links to a field in the parent entity, specify the name of the parent field. See Creating Multiple Filegroups for more information on sub-types. (Note that if you specify a value of ID for this field in a top-level entity, Aptify will not generate a foreign key for this field, even if it is marked as Required. For top-level entities, the system does create a foreign key if specify a value other than ID.)
-
Base Field: If you are creating a new base field that is very similar to an existing base field, you can specify the existing base field to load its settings into the new record. Then, you can make the necessary modifications to differentiate this new Base Fields record.
- If the base field is to be a drop-down list (standard or data combo), configure the Values tab. See Standard Combo Drop-down List or Data Combo Drop-down List for details.
- Configure the field's Options, Validation, and Security tabs. See About the Fields Form for information on these tabs.
- Once all field characteristics have been set, save and close the Base Fields record.
Using Base Fields
Base fields are used when defining fields for an Entities record. Instead of manually setting all characteristics for a field, using a base field saves time by defaulting all options automatically based on the original configuration of the base field.
- Open a new Fields record from the Fields tab of an Entities record.
- On the General tab, select a Base Field from the list. This list contains all base fields currently set up within the system.
-
When the base field is selected, the new field automatically obtains the base field's default options, values, and other characteristics. Any of these characteristics may be modified.
-
When the base field is selected, the new field automatically obtains the base field's default options, values, and other characteristics. Any of these characteristics may be modified.
-
Enter a Name for the new field.
- The name does not automatically flow down from the Base Fields record since a field name should be configured on a field-by-field basis.
- If the entity contains multiple base tables, select a Base Table for the field from the drop-down list.
-
Save and close the Fields record once all characteristics have been defined as necessary.
When a base field is selected on the Fields record, the characteristics of the base field overwrite any existing settings for the Fields record except for the Name, Display Name, and Description (if they are not blank when the Base Name is selected).
About Base Fields
- The Base Field record's Derived Entity Fields tab displays all of the entity fields that are based on this base field.
- Updating a Base Fields record can automatically update all of the Field's records that are based on that base field. For this reason, fields based on Base Fields records should not be modified individually and all characteristics inherited from the Base Field record should be left as is.
- When you modify a Base Fields record, the system prompts you to confirm that all of the Base Field record's derived entity fields should be updated as well. After clicking Yes, the system displays a Base Field Save Status bar so you can track the progress of the update process.
Administering Dashboards
A digital dashboard is a workspace that provides access to many common functions within Aptify. In many cases, a user can perform all of his or her common day-to-day tasks directly from one or more dashboards without having to access the Navigation Bar, Folder List, or individual views.
Each Aptify Application has one or more associated dashboards. In addition, the system provides a main dashboard that appears each time a user opens the Aptify application and each time a user selects the Home heading.
To create new dashboards, Aptify recommends that you use the Dashboard Options dialog to copy an existing global dashboard associated with a particular application. See Creating a Personal Dashboard for more information.
This topic provides an overview of the services associated with the Dashboards functionality and how the records in these services interact. It also describes how administrators can modify the properties of user-level dashboards they create to deploy them globally or to a particular group of users.
This topic covers the following sub-topics:
- About the Dashboard Services Hierarchy
- About the Dashboard Selection Methodology
- Modifying the Scope and Rank of a Dashboard
See About the Administration Application Forms for field-by-field description of each service associated with Digital Dashboards. Note that the field-by-field description is provided for informational purposes only.
About the Dashboard Services Hierarchy
Aptify stores data related to dashboards in nine services. Aptify automatically creates records in each of these services as necessary when a user designs a dashboard using the Dashboard Options dialog (see Creating a Personal Dashboard for more information). These services interact as described below:
- Dashboards: This is the top-level record for the dashboard container. This record stores the name of the dashboard, its scope, its rank, and other values. Each dashboard is comprised of one or more areas, which is in turn comprised of one or more parts. Note that when you delete a Dashboard's record in the Dashboards service, Aptify automatically deletes its corresponding areas and parts as well.
-
Dashboard Areas: This service stores information about each dashboard area, including area's default size and location. Each area is linked to one parent Dashboards record. An area is a container for one or more parts.
- When a user modifies an area's dimensions for a global or group level dashboard, the user's personal settings are saved in a Dashboard Area User Values record. Note that this service is not associated with an application by default.
-
Dashboard Parts: This service stores information about each dashboard part, including the component and input map parts used to display the desired information on the dashboard and the part's default size and location with the area. Each part is linked to one parent Dashboard Areas record.
- When a user modifies a part's appearance in a global or group level dashboard, the user's personal settings are saved in a Dashboard Part User Values record. Note that this service is not associated with an application by default.
-
Dashboard Components: This service stores the components that can be used by a dashboard part, and each component's input properties (which flow down to a part's input map). These components are reusable and include the Microsoft Outlook components, the View Container, and the Button Bar. See Configuring Dashboard Part Components for information on the standard components provided with Aptify.
- Dashboard Components can be grouped by category. The standard system includes one category (General) but you can add additional categories as necessary. These categories are stored in the Dashboard Component Categories service.
- Dashboard Button Bars: When a user creates a dashboard part that uses the Button Bar component, Aptify automatically creates a Dashboard Button Bars record that stores general information about the button bar's appearance and default button behavior. Each button bar has one or more buttons.
- Dashboard Buttons: This service stores information about each button that appears in a button bar, including the button's action type and properties that determine what system operation is performed when a user clicks the button. See Configuring the Button Action Types for information on the standard button action types provided with Aptify. Each Dashboard Buttons record is linked to one Dashboard Button Bars record.
About the Dashboard Selection Methodology
An application may have multiple dashboards associated with it that a particular user can access. When a user selects an application in Aptify, the system uses the following methodology to determine which dashboard to display:
- If the user has previously specified a default dashboard for this application, the system displays that dashboard. See Specifying a Default Dashboard for information on how a user selects a default dashboard.
- If there is no default dashboard for a particular user and application, the system selects a User-scope dashboard first (if one exists for the current user). If a User-scope dashboard does not exist, the system selects a Group-scope dashboard. If neither a User or Group dashboard exists, then the system selects the Global-scope dashboard.
- Note that dashboard selection purposes, a user is associated with only one group (his/her Primary Group). A user is assigned a Primary Group in the Users record.
- If the system identifies multiple dashboards with the same scope, the system uses the record with the lowest rank.
- If the system identifies multiple dashboards with the same scope and the same rank, the system displays the dashboard whose record has the lowest ID.
- Even if the system does not display a dashboard by default, a user can still switch to that dashboard (assuming it is available to the user). Also, a user can specify any of his/her available dashboards as the default dashboard for a particular application. See Switching Dashboards for details.
Modifying the Scope and Rank of a Dashboard
An administrator can change a dashboard's scope and rank as necessary (following the criteria described About the Dashboard Services Hierarchy) to configure the system to display a particular dashboard for a particular user.
The following steps describe how an administrator can create a new dashboard and then modify its settings to deploy it globally, or to a group or user.
- Use the Dashboard Options dialog to create a new dashboard, either by copying and modifying an existing dashboard or creating a new dashboard from scratch.
- See Creating a Personal Dashboard or Creating a New Dashboard for information on how to use the Dashboard Options dialog to create user-level dashboards.
- Open or create a view of the Dashboards service.
- The Dashboards service is found in the Aptify Framework Administration application.
- Open the record for the dashboard you created in Step 1.
- Dashboards created using the Dashboard Options dialog are personal dashboards that have a Usage Scope of User and are linked to the specific User who created it.
- Note that access to a dashboard is controlled by the Usage Scope and Group/User fields. The User Permissions and Group Permissions tabs are reserved for future use.
- Change the dashboard's Usage Scope.
- If you want the dashboard to be available to all users, change the value to Global.
- If you want the dashboard to be available to members of a specific group, change the value to Group and enter a group in the Group field.
- Note that for dashboard selection purposes, a user is associated with only one group (his/her Primary Group). A user is assigned a Primary Group in the Users record.
- Note that for dashboard selection purposes, a user is associated with only one group (his/her Primary Group). A user is assigned a Primary Group in the Users record.
- Modify the Rank value as necessary.
- If you created a new dashboard from scratch, the default rank is 0. If you created a copy of an existing dashboard, the copy's rank is the same as the rank for the dashboard you copied.
- If two or more dashboards have the same scope and the user has not specified a default dashboard, the system displays the dashboard with the lowest rank.
- Save and close the record.
After saving a dashboard with a Usage Scope of Group or Global, you can no longer use the Dashboard Options dialog to modify it. The Dashboard Options dialog is only available for User-scope dashboards,
Using the Data Packing and Unpacking Wizards
Aptify provides data packing and unpacking wizards that facilitate the migration of record data from a development server to an organization's production server. For example, to deploy a newly developed process flow on the production server, the Process Flow data records are packed on the development server and then unpacked on the production server. By default, a user can launch the Data Packer and Un-Packer wizards from the view toolbar of the following services:
- Base Fields
- Configuration Manifests
- Dashboards
- Form Templates
- Message Parts
- Message Templates
- Process Components (Data Packer only)
- Process Flows
- Scheduled Tasks
- Views
- Wizards
Note that to successfully pack and unpack data, the user running these wizards should be a member of the computer's local Administrators group.
Aptify has a UniqueID field. The Data Packer and Unpacker processes will use the UniqueID field as the unique identifier for the record. During installation, Aptify will attempt to match existing records with records initially included with Aptify in order to set the UniqueID to a value that matches Aptify's record. This allows Aptify to identify core records and update them accordingly. When no definitive match is found, a new unique identifier will be generated and used to populate the UniqueID field for that record.
This topic covers the following sub-topics:
Packing Data
Follow these steps to pack the data that you want to move to another server:
- Launch the Data Packer from a view of one of the services listed above.
- On the wizard's Welcome screen, click Next to continue.
- Select one or more entities whose records you want to pack and click Next.
- The wizard displays all of the entities that have the SupportsPacking attribute. See About the Packing Attributes for details.
- By default, the check box is selected in the Selected column for the entity that you launched the wizard from.
- Use the Check All button to select all of the available services.
- Use the Uncheck All button to clear the check boxes in the Selected column for all entities.
- Select the records in the selected Entities that you want to pack and click Next.
- A separate tab appears for each entity that you selected in the previous steps. All of the records in that entity appear on this tab.
- The fields are listed in the order in which they appear in the entity. However, the Filter Rule functionality has been modified to sort the Field last alphabetically when adding or modifying Filter Rule statements. A user can sort by the Field or Description fields. The direction of the sort (ascending or descending) is determined by the direction of the arrow in the right-hand corner of the column heading.
- By default, if one of the selected Entities is the entity you launched the data packing process, the records that are included in the view in which you launched the wizard are selected.
- Specify a name for the data package and specify the network location where the files should be copied. Click Next to continue.
- You do not need to add an extension for the package name; the system will automatically add the .RECPAK extension.
- If you want the wizard to include any Object Repository Objects referenced by a packed record, leave the Pack Repository Objects option selected. If you do not want the objects packed, clear this option.
- In general, you should clear the Pack Repository Objects option if you are only packing Views records. Views records do not generally have associated Repository Objects so removing this option reduces the complexity of the packing operation.
- In general, you should clear the Pack Repository Objects option if you are only packing Views records. Views records do not generally have associated Repository Objects so removing this option reduces the complexity of the packing operation.
- Review the packing summary and click Finish to begin the packing process.
- You can also click the Back button if you want to make changes based on your review of the packing summary.
- When prompted, click OK to confirm the packing operation.
- Click OK when the packing process is finished.
- Review and then close the processing log.
- The records you selected were added to a Recpak folder in the location you specified. The name of the folder is the package name you specified (with a .Recpak extension).
- The system packs the records you selected and their dependent records.
- If you checked the Pack Repository Objects option, the wizard adds any related Repository objects to an _aptify_objects folder.
- Each entity that has packed records has its own sub-folder in the data pack.
- The _aptify_entitymap.txt file stores a mapping of Entity IDs to the Entity Names for the Entities that are referenced in the packed records.
- The _aptify_unpack_steps.txt file determines the order in which records should be unpacked on the target server to ensure that a record is unpacked before its dependent records.
About the Packing Attributes
There are three Entity Attributes (configured in an Entity record's Configuration > Attributes tab) that determine packing behavior:
- SupportsPacking: When set to 1, the entity appears in the Data Packer. When not specified, an entity does not support data packing.
-
PackingUniqueKeyList: Comma-delimited string of entity fields. During an unpacking operation, all values for the listed fields must be identical for two records in order for these records to be considered a match. If not specified, record matching is based on record name only.
- A record's name corresponds to the entity field that has the Is Name Field option checked.
- For example, two Process Flow records that have the same Name and the same Category are considered a match by the data unpacking process.
-
PackingEntityRelations: Name of related entity whose records should also be packed when the selected entity's records are packed.
- For example, the Process Flows entity has Process Flow Steps as the packing Entity Relation. Therefore, when a Process Flow is packed, the corresponding Process Flow Steps associated with the Process Flow are also packed. This relation is needed since only the first step in a process flow is actually linked to the Process Flows record (subsequent steps are linked to its preceding step).
- For example, the Process Flows entity has Process Flow Steps as the packing Entity Relation. Therefore, when a Process Flow is packed, the corresponding Process Flow Steps associated with the Process Flow are also packed. This relation is needed since only the first step in a process flow is actually linked to the Process Flows record (subsequent steps are linked to its preceding step).
Unpacking Data
Follow these steps to unpack a data pack on an Aptify system:
- Copy the Recpak file to the destination server.
- Launch the Data Unpacker wizard from the view toolbar of a service (such as the Form Templates, Views, Dashboards, or Process Flows service).
- Click Next to continue.
- Specify the directory that contains the Recpak file and click Next.
- Specify the Recpak files to unpack (if there are multiple Recpak files in the specified directory) and click Next.
- Clear the Upgrade Existing Records option if you do not want to update existing records.
- When this option is selected, the system updates matching records. Matching is based on the fields specified in the entity's PackingUniqueKeyList attribute (or the record name if a PackingUniqueKeyList is not specified for a particular entity).
- When this option is cleared, the system checks for matching records and if a match already exists on the target server, the record in the data pack is not unpacked on the target server.
- Clear the Unpack Repository Objects option if you do not want to unpack any Object Repository Objects stored in the data pack.
- Typically, you do not want to unpack objects if new versions of the objects in the data pack already exist on the target server.
- Typically, you do not want to unpack objects if new versions of the objects in the data pack already exist on the target server.
- Click Finish to begin the unpacking process.
- When prompted, click OK to confirm the unpacking operation.
- Click OK when the unpacking process is finished.
- Review and then close the processing log.
A data pack may contain references to one or more entities. All entities referenced in that data pack must exist on the target server in order for the unpack process to complete successfully. If an entity referenced in the data pack does not exist on the target server, the unpacking process fails and reports the name of the entities that need to be installed on the target server using the Entity Packer/Unpacker before the data can be unpacked successfully. See Using the Entity Packing and Unpacking Wizards for information on packing and installing entities.
Creating Database Objects
The Database Objects service provides database administrators with a tool for creating, viewing, and editing database-related objects (such as views, stored procedures, and triggers). In providing this service, Aptify allows administrators to modify database objects directly using the Aptify graphical user interface.
Note that an administrator should not modify or create database objects through SQL Server Enterprise Manager since Aptify maintains additional metadata on each database object in the system.
Some database objects are created automatically by the system. For example, when a new Entities record is defined, the view for the entity and the four default stored procedures (Get, Create, Update, Delete) are created automatically. Additional database objects can be created as organization-specific business logic requires.
Follow these steps to create a new Database Object:
- Open a new record from the Database Objects service.
- Enter the Name of the database object.
- Aptify recommends that you use the common naming convention for each type of database object. For example, all stored procedures should begin with the prefix sp, and all views should begin with the prefix vw.
- Enter a Description of the database object.
- Select the SQL Server database where the object is to reside in the DB field.
- Select the database Object Type:
- View: Views are virtual tables and are often used to filter data or join data from multiple tables.
- Stored Procedure: Stored procedures are groups of transact-SQL statements combined into one execution plan. These can take input data, return data, and implement business logic as needed.
- Trigger: A trigger is a special type of stored procedure that is designed to run automatically whenever an Update, Insert, or Delete command is run against the specified table or view. First, Last, and Instead Of triggers are supported in Aptify.
- Function: User-defined functions consist of transact-SQL statements that can accept input parameters and return data.
- Enter the SQL statements for the database object in the SQL tab.
- To format the SQL statement, click the Format button.
- If you paste unformatted text from another source into the record, you can click the Format button to update the formatting.
-
The Recompile button recompiles the SQL statement if the code is updated.
If your SQL expression uses any Outer Join operations, use the ANSI Outer Join operators (LEFT OUTER JOIN or RIGHT OUTER JOIN) rather than the non-ANSI operators (= or =). SQL Server does not support SQL statements that use non-ANSI outer join operators.
- To format the SQL statement, click the Format button.
- Click the Grant SQL tab and specify user permissions.
- Users must have permissions to the database objects in order for them to execute.
-
Permissions for the four default stored procedures and view for entities are granted automatically by the system when entity permissions are configured. Permissions for additional database objects created to handle organization-specific business logic should be granted manually through the Grant SQL tab of the Database Objects record.
If SQL Is Generated and/or Grant SQL Is Generated appear to the right of the DB and Type fields, Aptify automatically generated this database object. This text will not appear for new database objects that you create manually or for database objects that you manually update.
- If desired, click the Required DB Objects tab and specify any related database objects that you reference in this new Database Objects record. When creating an entity or data pack that includes your new object, the system will also pack the objects you specify in this tab.
- Save the Database Objects record.
Administering Entity Bulk Operations
The Entity Bulk Operations service allows an organization to update specific data in multiple records without requiring a user to modify each record manually.
Each Entity Bulk Operations applies to records in only one Aptify entity. Once an entity has one or more bulk operations associated with it, an Entity Bulk Operation wizard icon appears in the toolbar for views of that entity.
When a user launches the Entity Bulk Operation wizard from a view, the bulk operation business logic operates on a per-record basis, which means that the bulk operation function is called once for each record selected in the view. The wizard updates specific fields in each record based on the rules defined in the corresponding Entity Bulk Operations record.
The Entity Bulk Operations wizard is supported for use in List, Prompt, and Chart Drilldown views for the Aptify Desktop client. This wizard is supported in the Aptify web interface.
An administrator specifies the following information in each Entity Bulk Operations record:
- Entity to which the operation applies.
- A set of rules or a custom component that defines the operation.
- Security settings to define who can run the operation.
The rule-based bulk operations are most commonly used and allow an administrator to easily define rules that modify top-level entity information within each entity record in the target view the bulk operation is running on. However, in some cases, rules are not robust enough to capture the changes or other business logic needed in a bulk operation. For this reason, Aptify provides an interface through which each customer may link their own components for bulk operation logic.
For component-based operations, rather than using the standard bulk operation rule interpreter (IEntityBulkOperation), the object defined in the Object field is called, which then implements the business logic needed for each record.
See the following sub-topics for more information on creating and using Entity Bulk Operations:
- Configuring Entity Bulk Operations
- Defining Rules for Entity Bulk Operations
- Selecting a Component for Entity Bulk Operations
- Assigning Permissions for Entity Bulk Operations
- Executing the Entity Bulk Operation Wizard
- About the Entity Bulk Operation Entity Attributes
- About the Entity Bulk Operations Form
Configuring Entity Bulk Operations
An administrator can configure an Entity Bulk Operation based on logic defined either by Bulk Operation Rules records or by linking the operation to a .NET component.
The following steps describe the initial configuration of an Entity Bulk Operations record:
- Open a new record from the Entity Bulk Operations service.
- Enter a Name for the entity bulk operation.
- This name displays in the list of available operations when the user runs the Entity Bulk Operations wizard.
- Enter the entity on which the bulk operation should run in the Entity field.
- Select the type of entity bulk operation in the Type field:
- Rule: The logic for the entity bulk operation will be defined through Bulk Operation Records configured from the Rules tab.
-
Component: The logic for the entity bulk operation will be defined by selecting a .NET component.
- Specify whether the bulk operation should run as a single transaction or as multiple transactions.
- When Run As Single Transaction is selected, the Entity Bulk Operation wizard updates all the selected records in one SQL transaction. If any of the records fail to update, all records processed up to that point roll back to their original version.
-
When Run As Single Transaction is cleared, each record processes as its own transaction, and only the records that fail roll back. If the bulk operation is run on a large number of records in a view, the system locks the records and other users may be blocked as a result. This option is not recommended if the bulk operation is set to update records with dependencies.
Create Audit List is reserved for future use.
- If you want to limit the bulk operation to specific users and/or groups, clear the Allow Everyone to Run option.
- When Allow Everyone to Run is cleared, the Group Permissions and User Permissions tab become available.
- Click the Details tab and enter additional information about the bulk operation in the Comments field (optional).
- Note that you can enter text in the Help Text field for tracking purposes, but additional functionality associated with this field is not currently implemented.
- Save the Entity Bulk Operations record.
- Once the record has been saved, the Rules tab becomes available.
- Continue the configuration of the Entity Bulk Operations record by:
- Defining rules (applicable if Type is set to Rule). See Defining Rules for Entity Bulk Operations.
- Selecting the .NET component that the Entity Bulk Operation should use (applicable if Type is set to Component). See Selecting a Component for Entity Bulk Operations.
- Defining security permissions (only applicable if the Allow Everyone to Run option is cleared). See Assigning Permissions for Entity Bulk Operations.
Defining Rules for Entity Bulk Operations
By default, the Type field on the General tab of the Entity Bulk Operations record is set to Rule. This indicates that the logic for the entity bulk operation is based on the rules defined on the Rules tab of that Entity Bulk Operations record.
Each Rules record applies to a field in an Entities record. The Rules tab is only available once the Entity Bulk Operations record has been saved for the first time.
This topic contains sub-topics that describe how to create a rule for a field in a top-level entity and how to create a rule for a field in a sub-type entity:
- Creating an Entity Bulk Operation Rule for Top-Level Entity Field
- Creating an Entity Bulk Operation Rule for Sub-Type Entity Field
Creating an Entity Bulk Operation Rule for Top-Level Entity Field
Follow these steps to create a rule that modifies the value of a field in the top-level entity you specified on the Entity Bulk Operation's General tab.
- Click the Rules tab on an Entity Bulk Operations record.
- Open a new Rules record from the Rules tab of the Entity Bulk Operations record.
- Select a field from the Field Name drop-down list.
- This list displays all field names from the Entity selected on the General tab of the Entity Bulk Operations record.
- Enter a description of the rule in the Comments field (optional).
- Leave Type set to Top Level.
- Select the Value Type from the list:
- Static: With this option, which is selected by default, the bulk operation updates the selected field to use the value specified in the Value field.
- Prompt: With this option, the Entity Bulk Operation wizard prompts the user to enter a new value for the selected field. The bulk operation updates the records to use the specified value.
- Formula: With this option, the bulk operation runs a specified SQL statement to obtain a new value for the selected field.
- Configure the rule's value and related fields, depending on the Value Type you selected:
-
Static: Enter a static value in the Value field.
- Prompt: Enter a default value to use for this entity field (optional) in the Default Value field and a user message in the Prompt Message field.
-
Formula: Enter a SQL statement that defines a new value for the specified entity field in the Formula field.
-
For example, if you want to increase a company's current credit limit by $500, use this formula:
CONVERT(int, CreditLimit + 500)
The Entity Bulk Operation code takes this formula and updates the CreditLimit field in all records in the view.
-
-
Static: Enter a static value in the Value field.
- Click OK to save and close the Rules record.
- Add additional rules as needed for the entity bulk operation.
- Alternatively, you can click OK and New in Step 8 to save the current record and open a new Rules record in one step.
- Save the Entity Bulk Operations record.
Creating an Entity Bulk Operation Rule for Sub-Type Entity Field
You can create entity bulk operations that modify field values for sub-type data. For example, if you want to specify an End Date for a specific set of PersonFunctions sub-type records, you can create a rule-based Entity Bulk Operation for the Persons entity that modifies the relevant PersonFunctions sub-type records.
Follow these steps to create a rule that changes the value of a field in a sub-type entity for the entity you specified on the Entity Bulk Operation's General tab:
- Click the Rules tab on an Entity Bulk Operations record.
- Open a new Rules record from the Rules tab of the Entity Bulk Operations record.
- Set Type to Sub Type.
- The Sub Type Name and Sub Type Filter fields appear automatically at the bottom of the form.
- Enter the name of the sub-type entity in the Sub Type Name field.
- This should be a sub-type of the entity you specified in the Entity field on the Entity Bulk Operations record's General tab.
- Once the Sub Type Name field is populated, the set of fields from that sub-type entity automatically populate the Field Name drop-down list.
- Select a field from the Field Name drop-down list.
- Enter a description of the rule in the Comments field (optional).
- Select the Value Type from the list:
- Static: With this option, which is selected by default, the bulk operation updates the selected field to use the value specified in the Value field.
- Prompt: With this option, the Entity Bulk Operation wizard prompts the user to enter a new value for the selected field. The bulk operation updates the records to use the specified value.
- Formula: With this option, the bulk operation runs a specified SQL statement to obtain a new value for the selected field.
- Configure the rule's value and related fields, depending on the Value Type you selected:
- Static: Enter a static value in the Value field.
- Prompt: Enter a default value to use for this entity field (optional) in the Default Value field and a user message in the Prompt Message field.
- Formula: Enter a SQL statement that defines a new value for the specified entity field in the Formula field.
- If needed, specify a valid WHERE clause in the Sub Type Filter field to target the value change to a specific set of sub-type records.
- Do not enter the word WHERE in the filter statement. The system appends this keyword automatically.
- In the example below, the rule only modifies PersonFunctions sub-type records where the FunctionID is 8.
- Click OK to save and close the Rules record.
- Add additional rules as needed for the entity bulk operation.
- Alternatively, you can click OK and New in Step 10 to save the current record and open a new Rules record in one step.
- Save the Entity Bulk Operations record.
Selecting a Component for Entity Bulk Operations
Entity Bulk Operations may use a component to implement the required logic instead of rules. A developer needs to create the component with desired functionality in Visual Studio .NET and then add the compiled object to Aptify's Object Repository. Here is an overview of the process for creating new Entity Bulk Operation components:
- The organization defines the actions required of the Entity Bulk Operation.
- A developer writes and compiles an object in Visual Studio .NET that performs the required actions.
- The object needs to implement Aptify's standard IEntityBulkOperation interface. See the Aptify Software Development Kit (SDK) for more information on this interface.
- A developer or administrator adds the bulk operation object to the Aptify Object Repository.
- A developer or administrator creates an Entity Bulk Operations record, as described in Configuring Entity Bulk Operations and configures it to use the new component.
Follow these steps to create a component-based Entity Bulk Operations record:
- On the Entity Bulk Operations record's General tab, select Component from the Type drop-down menu.
- The Component-related fields become available.
- Enter the component's Object Repository location in the Object field.
- Click the plus (+) sign icon to browse for the object's repository location.
- Enter the object's assembly name in the Assembly field.
-
Enter the name of the class that defines the functionality for the operation in the Class field.
The Icon and Icon Small fields are reserved for future use.
- Save the Entity Bulk Operations record.
Assigning Permissions for Entity Bulk Operations
By default, Entity Bulk Operations are accessible to all users and all groups that have been granted permission by the system administrator to the entity on which the bulk operation is based. If further restrictions are necessary, you can configure security permissions for entity bulk operations as described below.
- Configuring Entity Bulk Operation Permissions for Groups
- Configuring Entity Bulk Operation Permissions for Users
Configuring Entity Bulk Operation Permissions for Groups
The purpose of this topic is to describe how to configure the group permissions for Entity Bulk Operations. To do this, perform the following steps:
- On the General tab of an Entity Bulk Operations record, clear the Allow Everyone to Run option.
- When this option is cleared, the Groups Permissions and User Permissions tabs become available.
- Click the Group Permissions tab and open a new Group Permissions sub-type record.
- Select the group from the Group drop-down list.
- Enter additional information in the Comments field (optional).
- Click OK to save and close the Bulk Operations Group Permissions record.
- Save the Entity Bulk Operations record.
- Add additional groups as needed.
- Alternatively, you can click OK and New in Step 5 to save the current record and open a new Group Permissions record in one step.
Configuring Entity Bulk Operation Permissions for Users
The purpose of this topic is to describe how to configure the user permissions for Entity Bulk Operations. To do this, perform the following steps:
- On the General tab of an Entity Bulk Operations record, clear the Allow Everyone to Run option (if not already cleared).
- When this option is cleared, the Groups Permissions and User Permissions tabs become available.
- Click the User Permissions tab and open a new User Permissions sub-type record.
- Enter a user in the User field. This field links to the Users service.
- Enter additional information in the Comments field (optional).
- Click OK to save and close the Bulk Operations User Permissions record.
- Save the Entity Bulk Operations record.
- Add additional users as needed.
- Alternatively, you can click OK and New in Step 5 to save the current record and open a new User Permissions record in one step.
Executing the Entity Bulk Operation Wizard
Users can execute an Entity Bulk Operation wizard from a view of the service that is defined in the Entity field on the Entity Bulk Operations record.
Follow these steps to run an Entity Bulk Operation, broken down by interface:
Aptify Web Interface
-
Create a view of the entity linked to the bulk operation.
The wizard is supported for use in List, Prompt, and Chart Drilldown views.
- Select the records to which you want to apply the bulk operation.
- To run the operation for all records in the view, do not select any records. If you select one or more records, the operation will run for only those selected records.
- In the More pull-down menu, select Entity Bulk Operations Wizard to launch the wizard.
- Click Next to begin the wizard.
- Select the bulk operation you want to run and click Next.
- You can select from multiple bulk operations if the entity has more than one bulk operation associated with it.
- You can select from multiple bulk operations if the entity has more than one bulk operation associated with it.
- If any of the rules were configured with Value Type set to Prompt, review the prompted message text and enter the value that the bulk operation should use for the rule. Click Next to continue.
- Click Finish to execute the bulk operation.
- After the bulk operation executes, the wizard prompts to run another bulk operation on the same set of data.
- Click Yes and the wizard returns to the bulk operation selection screen. Follow the wizard prompts as before to complete the operation.
- Click No to close the Entity Bulk Operations wizard.
Aptify Desktop Client
-
Create a view of the entity linked to the bulk operation.
The wizard is supported for use in List, Prompt, and Chart Drilldown views.
- Select the records to which you want to apply the bulk operation.
- To run the operation for all records in the view, do not select any records. If you select one or more records, the operation will run for only those selected records.
- Click the Entity Bulk Operations Wizard icon in the view toolbar to launch the wizard.
- Click Next to begin the wizard.
- Select the bulk operation you want to run and click Next.
- You can select from multiple bulk operations if the entity has more than one bulk operation associated with it.
- You can select from multiple bulk operations if the entity has more than one bulk operation associated with it.
- If any of the rules were configured with Value Type set to Prompt, review the prompted message text and enter the value that the bulk operation should use for the rule. Click Next to continue.
- Click Finish to execute the bulk operation.
- After the bulk operation executes, the wizard prompts to run another bulk operation on the same set of data.
- Click Yes and the wizard returns to the bulk operation selection screen. Follow the wizard prompts as before to complete the operation.
- Click No to close the Entity Bulk Operations wizard.
About the Entity Bulk Operation Entity Attributes
The Entity Bulk Operations entity includes the following seven (7) attributes that define the behavior of the entity bulk operation functionality.
In general, clients will not want to modify these attributes; this information is provided for reference purposes only. These attributes can be found on the Entity Bulk Operations Entities record's Configuration > Attributes sub-tab.
- ProcessClass: This attribute specifies the class that -implements the -IEntityBulkOperationProcessor interface, which is the functionality that controls how the system executes a batch of Entity Bulk Operations. By default, this is Aptify's standard EntityBulkOperationProcess class. See the Aptify Software Development Kit (SDK) for more information on these items.
- StandardRecordClass: This attribute specifies the standard EntityBulkOperation class that -implements the IEntityBulkOperation interface. For rule-based Entity Bulk Operations, the system uses this class to execute an operation on a particular record. For Component-based Entity Bulk Operations, the system does not use this class; instead, it uses the class specified on the Entity Bulk Operations record. See the Aptify SDK for more information on the EntityBulkOperation class and the IEntityBulkOperation interface.
- WizardClass: This attribute specifies the class for the standard Entity Bulk Operation Wizard object. See the Aptify SDK for more information on the EntityBulkOperationsWizardForm class.
- StandardRecordAssembly: This attribute specifies the assembly name for the object that includes the class specified in the StandardRecordClass attribute.
- ProcessAssembly: This attribute specifies the assembly name for the object that includes the class specified in the ProcessClass attribute.
- WizardAssembly: This attribute specifies the assembly name for the object that includes the class specified in the WizardClass attribute.
-
WizardIcon: The value of this attribute specifies the Object Repository location of the icon to use for the Entity Bulk Operations wizard in a view toolbar. The format for this value is Package Name.Object Name.
-
SupportsPacking: When set to 1, the entity appears in the Data Packer. When not specified, an entity does not support data packing.
The Entity Bulk Operations wizard is supported for use in List, Prompt, and Chart Drilldown views.
The Entity Bulk Operations form defines the bulk operations (such as mass updates to data) configured for entities.
General Tab
Name (Required)
The Name field holds the name of the Entity Bulk Operation.
Description
The Description field stores the description of the Entity Bulk Operation.
Entity (Required)
The bulk operation defined in this record runs against the entity chosen in this field. For example, if the Dashboards entity is selected in this field, the Bulk Operation Wizard icon appears in the display window toolbar of the Dashboards service.
Type (Required)
An Entity Bulk Operation can have one of the following types:
- Rule: The Entity Bulk Operation follows a set of rules defined in the Rules tab in the Entity Bulk Operation record. Each rule applies to a field in the specified Entity.
- Component: The Entity Bulk Operation uses logic contained in a specified component to perform the updates to the Entity record(s). This is used when the business logic is too complex to be expressed as a standard rule.
Run As Single Transaction (Required)
If this option is selected, all the records in the view update in one SQL transaction. If any of the records fail to update, all records processed up to that point roll back to their original version.
If this option is not selected, each record processes as its own transaction, and only the records that fail roll back. If the bulk operation is run on a large number of records in a view, the system locks the records and other users may be blocked as a result. This option is not recommended if the bulk operation is set to update records with dependencies.
Create Audit List (Required)
If this option is selected, the Entity Bulk Operation writes the update information to a System Lists record. This feature is reserved for future use.
Allow Everyone To Run (Required)
If this option is selected, permission to run the given operation is granted to all users and all groups, and the Group Permissions and User Permissions tabs are disabled.
Object
The location of the bulk operation component in the Aptify Object Repository. This field is only available if the Type is set to Component. See Selecting a Component for information on how to create a component for an Entity Bulk Operation.
Assembly
The .NET assembly name of the object specified in the Component field. This field is only available if the Type is set to Component.
Class
The class in the specified component that contains the bulk operation logic to perform. This field is only available if the Type is set to Component.
Icon
The icon file in the Aptify Object repository for the object in the Object field. This field is reserved for future use. Note that it is only available if the Type is set to Component.
Icon Small
The small icon file in the Aptify Object repository for the object in the Object field. This field is reserved for future use. Note that it is only available if the Type is set to Component.
Rules Tab
The Rules tab lists all Rules that apply to this entity bulk operation. Each Rules record applies to a single field in the Entities record, and multiple rules may be configured for each entity bulk operation. This tab is only applicable if the Type is set to Rule.
Rules records define the rules for entity bulk operations. Each Rules record applies to a single field in the entity on which the bulk operation is based. For example, a rule may be created to update the credit status or limit for certain persons, or to update the area code for all persons in a certain region.
The Field Name field stores the name of the field on which the bulk operation rule applies. This field is a list of all fields for the entity the bulk operation is created for (if Type is set to Top Level).
If Type is set to Sub Type, then the system populates this drop-down list automatically using the fields from the sub-type that the user enters in the Sub Type Name field.
Comments
The comments field contains any additional details relevant to this Bulk Operation Rules record.
Type
Type indicates the type of record to be updated in the system.
- Top Level: Top Level bulk operations are created to update records stored in entities which are also services; for example, Persons, Orders, or Companies records.
- Sub Type: Sub Type bulk operations update record in entities which may only be accessed through other services. Prices records on the Products service is one example of a sub type. The Functions tab on a Persons record is another example.
Note that if you select the Sub Type option, the Sub Type Name and Sub Type Filter fields appear automatically at the bottom of the form.
Value Type
There are three value types available:
-
Static: If Static is selected, a Value field appears in the Rules record. The field listed in the Field Name is updated with the value in the Value field for all selected records in the given view.
-
Prompt: If Prompt is selected, the Default Value and Prompt Message fields appear in the Rules record. When the user runs the Entity Bulk Operation wizard, one of the steps in the Wizard prompts the user to enter values for all of the rules that have a Value Type of Prompt.
-
Formula: If Formula is selected, a Formula field appear in the Rules record. The Formula field is a SQL string that the Entity Bulk Operation evaluates. The operation inserts the results of the formula into the entity field selected in Field Name.
- For example, an Entity Bulk Operation to increase all Persons' Credit Limits by $500 (regardless of their current credit limits) has this formula: CONVERT(int, CreditLimit + 500)
- The Entity Bulk Operation code takes this formula and updates the CreditLimit field in the records selected within a view.
Sub Type Name
If Type is set to Sub Type, then this field appears on the Rules form. It specifies the name of the sub-type entity that contains the field to modify. This should be a sub-type of the entity specified in the Entity field on the Entity Bulk Operations record's General tab.
Note that once the Sub Type Name field is populated, the set of fields from that sub-type entity automatically populate the Field Name drop-down list.
Sub Type Filter
Specifies a WHERE clause that reduces the number of sub-type records in the resultset to modify. Do not enter the word WHERE in the filter statement. The system appends this keyword automatically.
Details Tab
Comments
The comments field contains any additional details relevant to the Entity Bulk Operations record.
Help Text
This feature is reserved for future use.
Group Permissions Tab
The Group Permissions tab contains a list of all Bulk Operation Group Permissions records, which define the groups granted permission to access this entity bulk operation when the Allow Everyone To Run option is not selected.
Bulk Operations Group Permissions records are used to assign groups the ability to run the entity bulk operation. Granting permissions to specific groups prevents users in non-qualified groups from running the bulk operation. By creating a Bulk Operations Group Permissions record for a defined group, each user belonging to that group has permission to run the current entity bulk operation.
Each group must have, at the minimum, read permissions defined on the entity in order to successfully run the bulk operation. For instance, if the bulk operation is defined to run on the Persons service, the group must have at least read and edit permissions for the Persons service. See Granting Entity Permissions to Groups for more information on setting permission attributes for users or groups. Additionally, the group must also have at least read permissions for the Bulk Operations Entity.
Bulk Operations Group Permissions records are only available from the Group Permissions tab of an Entity Bulk Operations record.
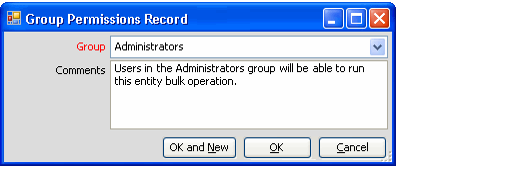
Group
The group to which permissions have been granted. This field is a list of all groups defined in the system.
Comments
Any comments relevant to this Group Permissions record
User Permissions Tab
The User Permissions tab contains a list of all Bulk Operation User Permissions records, which define the users who can execute this bulk operation when the Allow Everyone To Run option is not selected.
Bulk Operations User Permissions records allow the administrator to grant permissions to run the bulk operation to specific users configured in the Aptify system, without granting those permissions to any other users who might be members of the same groups. By creating a Bulk Operations User Permissions record for a defined user, this user is given permission to run the current Entity Bulk Operation.
Each user must have, at the minimum, read permissions defined on the entity to successfully run the bulk operation. For instance, if the bulk operation is defined to run on the Persons service, the user must have at least, read and edit permissions for the Persons service. See Granting Entity Permissions to Users for more information on setting permission attributes for users. Additionally, the user must also have at least read permissions for the Bulk Operations Entity.
Bulk Operations User Permissions records are only available from the User Permissions tab of an Entity Bulk Operations record.
User
The user to which permissions have been granted. This field links to the Users service.
Comments
Any comments relevant to the user permissions granted.
Attachments Tab
The Attachments tab lists any files relevant to the Entity Bulk Operations record.
Administering Filter Relationships
Aptify provides the ability to create a view in one service while filtering on fields that are related to another service. This allows a user to provide a view of one entity's records when only the filtering criteria from another related service is known. For example, if a user needs to access a group of Order records that were used to purchase a particular product, then the user must select the Products service to filter the search in the Orders service. Once linked to other entities, all of the fields within that entity are available as filter criteria for a view. In the example mentioned above, all of the fields within the Products service become available for further filtering criteria for the Orders view. Only the current service's records populate the generated view from the Find dialog box. For example, an Order-based search using Products service fields to filter the search always provides a view of Order records.
The associations that are used to tie these entities together for viewing purposes are called Filter Relationships. These relationships are added and edited from the Filter Relationships sub-tab on the Configuration tab of the Entities form.
This topic covers the following sub-topics:
Disabling Standard Filter Relationships
By default, all entities support three standard filter relationships:
- Record History: Users can filter records in a service based on Record History information.
- Lists: Users can filter records based on Lists to which these records belong.
- Topic Codes: Users can filter records based on characteristics of associated Topic Codes.
These relationships appear in the Services drop-down list in a view's Filters dialog, as shown below.
.
An administrator can disable one or more of these standard filter relationships as desired. Follow these steps:
- Open an Entities record.
- Click the Configuration > Filter Relationships tab.
- Clear the check box for one or more of the standard filter relationships.
- Save and close the Entities record.
The Record History, Lists, and Topic Codes filter relationships are visible in a service's filter dialog for administrative users, even if these options have been cleared in the service's Entities record.
Configuring New Filter Relationships
There are two types of filter relationships that may be configured within Aptify: One-to-Many and Many-to-Many. Each type of relationship is configured for the purpose of allowing users to search a view on the base entity using criteria from the related entity. The way each relationship type is configured is slightly different.
This topic contains the following sub-topics:
Setting Up One-To-Many Filter Relationships
In a one-to-many relationship, the base entity record can be linked to many related entity records, but the related entity record may only be linked to one base entity record. For example, an organization require the ability to search for persons who are the Ship To persons for orders taken. One person may be the ShipTo person for many orders, but each order has only one ShipTo person, which indicates that this must be a one-to-many relationship.
To provide this ability, a filter relationship is configured for the Persons entity to allow the user to use the ShipToID column from the Orders entity to filter a Persons view. This relationship is designed to allow the user to filter on orders where the ShipToID equals PersonID. The Persons entity includes this filter relationship by default.
A second example of a one-to-many relationship is the association between dashboard areas and dashboard parts. A dashboard area can have many dashboard parts, but a dashboard part can only be associated with one dashboard area.
Follow these steps to create this type of one-to-many filter relationship:
- Open a new Relationships form from the Entities form for the base entity (located in the entity's Configuration > Filter Relationships tab).
- For example, open a new Relationships form for the Dashboard Areas entity.
- For example, open a new Relationships form for the Dashboard Areas entity.
- Select the Related Entity from the list (such as the Dashboard Parts entity). Once this is selected, the Related Field list populates with all fields in the entity specified as the Related Entity.
- Select the Related Field. This is the field in the related entity that is linked to the base entity (such as the DashboardAreaID field in the Dashboard Parts entity that links parts to areas).
- Set the Relationship Type to One-To-Many.
- Enter a description. This description displays in the list of related entities when setting up a filtered view or search for the base entity.
- Click OK to close the Relationships form, then save the Entities record.
Setting Up Many-to-Many Filter Relationships
With many-to-many relationships, the base entity can be linked to many related entity records, and the related entity records can be linked to many base entity records. For example, an organization may require the ability to search for persons who have been assigned a particular function. Because each person can have many functions and each function could be linked to many persons, there is a many-to-many relationship between the Functions and Persons entities.
Many-to-many filter relationships are similar to one-to-many relationships in that the administrator must specify the Related Entity and Related Field. For many-to-many filter relationships, however, additional information must be specified. The Join Field and Join Table fields on the Filter Relationships form are only relevant when setting up many-to-many relationships between entities. For this example, the filter relationship between the Persons and Functions entities requires the join table vwPersonFunctions (which is also the base view for the PersonFunctions sub-type entity).
You may need to create a new join table to support your Many-to-Many Filter Relationship. This table should be added as a view to the Database Objects service. You may want to review the filter relationships and corresponding join tables provided by Aptify before attempting to create one of your own.
- Open a new Relationships form from the Entities form for the base entity (located in the entity's Configuration > Filter Relationships tab).
- Select the Related Entity from the list.
- Set the Relationship Type to Many-To-Many.
- Enter the name of the table that defines the link between the two entities in the Join Table field.
- Enter the name of the field within the Join Table that links the Join Table to the base entity into the Related Field field.
- For example, when creating a many-to-many filter relationship with Functions for the Persons entity, the Related Field corresponds to vwPersonFunctions.PersonID, which is the Persons entity's link in the Join Table.
- The Join Table should be a view in the Database Objects service. You may need to create this table that defines the relationship between the entities if one does not already exist.
- Enter the name of the field within the Join Table that links the Join Table to the entity specified as the Related Entity into the Join Field field (for example, FunctionID).
- Enter a description. This description displays in the list of related entities when setting up a filtered view or search for the base entity.
- Click OK to close the Relationships form, then save the Entities record.
Unlike in one-to-many relationships, many-to-many relationships do not share a direct link between the tables and require a join table to provide that link. For this reason, many-to-many relationships are also known as indirect relationships.
Using the Filter Rules Service
Aptify includes a generic filtering interface that evaluates record data against a defined set of criteria that references information from multiple records in Aptify. Several business applications in Aptify utilize this capability, including:
- Calculating Product Prices: See Creating Product Filter Rules for implementation details.
- Calculating Sales Tax on Products: See Specifying Order Lines Filter Rules for implementation details.
- Calculating Sales Tax on Shipping: See Specifying Order Shipments Filter Rules for more details.
- Calculating Shipping Costs: See Creating Shipment Type Groupings for more details.
- Setting Scope for Courses (requires the Education Management add-on): See Using the Scope Tab in Courses for more details.
- Setting Scope for Curriculums (requires the Education Management add-on): See Specifying Scope for a Curriculum for more details.
- Product Prerequisites: See Specifying Product Prerequisites for more details.
For product prices, an organization can create a filter rule to define the set of requirements that a customer must meet in order to receive the corresponding price. Likewise, for complicated Sales Tax scenarios, an organization can construct filter rules that apply a particular sales tax rate only under certain conditions.
In all of the cases described above, users can construct filter rules that evaluate field values from a wide variety of related entities, including Orders, Order Lines, Persons, and Products.
This topic describes the Filter Rules infrastructure and provides an overview of how filter rules can be expanded to other applications. See the sub-topics below for more information:
About the Filter Rules Infrastructure
In Aptify, entities that utilize filter rules have an embedded link to the Filter Rules entity. (See Creating Embedded Objects.) Also, the Filter Rule UI control appears on the form for each container entities. This control displays the standard, intuitive filtering dialog with which a user can construct simple or complex filtering rules.
The example shown below illustrates a filter rule that has been constructed for a Product Prices record. This rule applies a discount price if one of the Ship To and Bill To parties is associated with a particular company (Company ID 1928) and the current Quantity Available for the product is greater than 1000 units.
Since Filter Rules is an embedded link to ProductPrices, the specifics of the filter rule shown above is stored in the Filter Rules service and not directly in the ProductPrices sub-type record.
The filter rule information shown above is actually stored in the Filter Rules record shown below. Note that a user or administrator should never modify the Filter Rules record directly; any applicable changes should be made within the container record.
Each filter statement, referenced in the Logic String field, corresponds to a sub-type record stored on the Filter Rule Items tab (shown below).
Support for Date Keyword Filter Values
There may be situations where an organization wants to specify a certain date range without having to specify a specific date. For example, when wanting to offer a reduced price when someone registers for a meeting 30 days before the start of the meeting. Aptify supports the ability to use the following date keywords as values for date related filter rules:
- NOW
- TODAY
- GETDATE()
For example, a value TODAY - 30 for the OrderDate field would return all orders that were placed within the last 30 days.
The Filter Rules infrastructure includes three services that appear in the Aptify Framework Administration application by default:
- Filter Rule Operators: This service stores the set of operators available for a filter rule, such as Begins With or Exactly Matches for text-based fields. See About the Filter Rule Operators Form for more information on this service. In general, an organization should not need to add or modify the standard Filter Rule Operators.
- Filter Rule Types: This service stores the available filter rule types. Each filter rule implementation has its own Filter Rule Type. The set of entities that are available in the filter rule's Service drop-down list are defined in the Filter Rule Type's Entity Instances tab. An administrator can also manage which entities appear in a filter rules Service drop-down list. See About the Filter Rule Types Form for more information on this service. If you are adding the filter rule functionality to a new entity, you should create a new Filter Rule Type during the implementation process. See Adding Filter Rules to a New Entity for details.
- Filter Rules: This service stores the Filter Rules created by end users who work with a corresponding container entity (such as ProductPrices or Sales Tax). See the previous two figures for an example. Also, see About the Filter Rules Form for more information on this form. Aptify automatically creates new Filter Rules records as needed. The system automatically populates the Filter Rule Type based on the setting defined in the Filter Rules UI part on the container entity's form template.
Adding Filter Rules to a New Entity
An organization can add filter rule capabilities to a new entity as needed but this requires assistance from a developer so the system can evaluate a particular record against the criteria a user has specified in the filter rule.
- The following steps provide a general overview of the process for adding filter rule functionality to a new entity:
- Create a Filter Rule Types record for the new filter rule implementation.
- This includes defining the set of Entity Instances that a user will be able to use to construct filters. These correspond to the set of entities that appear in a filter rule's Services drop-down list. When a user selects a particular entity, Aptify automatically populates the Field list with the set of fields from that entity.
- An administrator can exclude a particular entity on the list of available Services, see the About the Filter Rule Type Entity Instances Form.
- The developer who is writing the corresponding business logic should provide the set of Entity Instances that should be added to the Filter Rule Type.
- Add an embedded link to the Filter Rules entity's ID field in your new entity.
- See Creating Embedded Objects for information on how to create an embedded link.
- Use the Visual Designer to remove the fields from the Filter Rules entity from your generated form, if applicable.
- See Using the Visual Designer to Modify Existing Fields for more information on deleting field parts from a form.
- Use the Visual Designer to add the Filter Rules UI control to your entity's form. Configure the control's Input Map as necessary.
- See Using the Visual Designer to Add New Fields or Controls and About the Visual Designer Filter Rules UI Control for more information.
- Create business logic that determines how to pass record data to the Filter Rule evaluator to determine if the current record matches the filter rule criteria defined by the user.
- Aptify expects that a developer will complete this step; additional details are beyond the scope of this topic. Refer to the Aptify Software Development Kit (SDK), Developing for Aptify, or consider taking an Aptify Developer training class for information on developer-related topics.
Administering the Generic Import Wizard
Aptify includes a wizard that imports any data into the system. This wizard is ideal for recurring imports of small sets of data. Note that this tool is not intended to be used for data conversions.
By default, the standard Aptify installation supports importing from tab-delimited text files, Microsoft Excel files, and Microsoft Access databases. Currently, for Azure environment, only “Tab Delimited Text File” and “Excel File” import source types are supported.
The following steps provide an overview of how to use the wizard to import data into Aptify:
- Identify the data that you want to import into Aptify. Also, identify the following:
- The current format of the data.
- The location where the data should be added into Aptify. For example, for the customer contact information to import, you will want to import that data into the Persons entity.
- If the data's format is not one of the existing source type, create a new Import Source Types record. See Creating New Import Source Types.
- Note that creating new source types requires that a developer write code.
- Create a new Import Sources record for your data. This record ties a import source type to the entity to which you are importing the data. Also, you can specify an object that overwrites the default record matching and posting behavior with your own business logic. See Creating Import Sources.
- This assumes that a suitable Import Source does not already exist. However, you can use an existing source if your system already has a record that specifies the data's source type, its fields, and the target entity.
- Note that creating your business logic for the matching and posting processes requires that a developer write code. Alternatively, you can define and modify matching criteria while running the Generic Import wizard, reducing the amount of code a developer needs to write to specify different matching logic. See Running the Generic Import Wizard for more details.
- Run the Generic Import wizard from the Import Runs service. See Running the Generic Import Wizard.
- Match import run details with existing records in the entity within the Import Runs record that was automatically generated by the wizard. Then, post the import run details to create new records for unmatched items. See Matching and Posting Import Results.
- Review the newly created records to confirm that the data was successfully imported into Aptify.
This topic covers the following sub-topics:
- Creating New Import Source Types
- Creating Import Sources
- Running the Generic Import Wizard
- Matching and Posting Import Results
Related Solution Articles
- Aptify Generic Import Wizard and Aptify Web
- Generic Import Wizard Run Completes with no data
- Aptify Generic import wizard and Aptify Web v2
Creating New Import Source Types
Aptify provides three default Import Source Types:
- Tab-delimited Text File: Import from a text file with field data separated by a tab.
- Excel File: Import from an Excel file.
- Access Database: Import from an Access database.
If you want to import data that is not in one of these formats, you need to create a new Import Source Type. Follow these steps:
- A developer writes and compiles code that implements Aptify's IImportSourceReader interface to create an import process for the desired file type.
- The developer writes and compiles code that implements Aptify's IImportSourceTypePropPage to specify the properties for the new source type.
- The Prop Page specifies an input map control that appears in the Generic Import wizard and on the Import Runs record's Input Maps tab.
- Creating new code is beyond the scope of this document. Refer to the Aptify Software Development Kit (SDK) for information on these interfaces.
- The developer or an administrator adds the source reader and property page object files to the Object Repository.
- See Creating Object Repository Objects for more information on adding new items to the repository.
- Open a new record from the Import Source Types service (found under the Aptify Framework Administration application).
- Specify the new source type's Name and Description in the fields provided.
- Enter the .NET assembly name for the SourceReader file in the Assembly Name field.
- Enter the Object Repository location of the SourceReader's object in the Object field.
- Alternatively, you can click the plus (Emoticon: plus) icon to the right of the field to open the Select Object Repository Object dialog. You can use this dialog to browse for an existing object or to add a new object to the repository (if you have not done so already). See Creating Object Repository Objects for details.
- Enter the class within the .NET assembly that corresponds to the SourceReader functionality in the Class field.
- Enter the .NET assembly name for the source's PropPage file in the Prop Page Assembly Name field.
- Enter the Object Repository location of the PropPage's object in the Prop Page Object field.
- Alternatively, you can click the plus (Emoticon: plus) icon to the right of the field to open the Select Object Repository Object dialog. You can use this dialog to browse for an existing object or to add a new object to the repository (if you have not done so already). See Creating Object Repository Objects for details.
- Enter the class within the .NET assembly that corresponds to the PropPage for this source type in the Prop Page Class field.
- Click the Input Properties tab.
- Define a sub-type record for each property required by the Input Source Type.
- This includes properties such as Filename and HasHeader.
- See the three default source types for sample Input Properties.
- Specify the property in the Name field, select the data Type from the drop-down list (such as String), and select the Is Required option, if the property is required to successfully perform the import operation.
- See About the Input Properties Form for information on the Input Properties form.
- See About the Input Properties Form for information on the Input Properties form.
- Save and close the Import Source Types record.
Creating Import Sources
An Import Sources record ties an Import Source Type with a target entity. You can also specify your own business logic for handling the matching and posting processes in an Import Run.
Before you can import data into an entity, you must have an appropriate Import Source configured. Follow these steps to create a new Import Source:
- If desired, a developer writes and compiles code that implements the appropriate Aptify interface to define matching or posting behavior.
- To develop new matching logic, a developer writes and compiles code that implements Aptify's IImportRecordMatch interface.
- To develop new posting logic, a developer writes and compiles code that implements Aptify's IImportRecordPost interface.
- Creating new code is beyond the scope of this document. Refer to the Aptify Software Development Kit (SDK) for information on these interfaces.
- If a developer has defined new matching or posting behavior, the developer or an administrator adds the matching and/or posting object file to the Object Repository.
- See Creating Object Repository Objects for more information on adding new items to the repository.
- Open a new record from the Import Sources service (found under the Aptify Framework Administration application).
- Enter a Name for the import source.
- Enter a source type in the Import Source Type link box.
- In the Mapping Entity link box, enter the entity that you want to import data to.
- In the Record Template link box, enter an existing Record Template for the entity you specified in the Mapping Entity field, if desired.
- This field is optional. If you specify a record template, records created by the Import Runs posting function will use the default specified in the template if the import file does not specify a value for a particular field. This is particularly useful if your entity has a required field that does not have a mapped field in the import file.
- For example, if your entity contains a required Category field that is not in your source data, the import fails since new records cannot be saved without specifying a category. However, if you use a Record Template that specifies a default category, the import succeeds since the posting process uses the information in the Record Template if not provided by the import file.
- See the Working with Record Templates and Administering Pending Changes for more information on Record Templates.
- This field is optional. If you specify a record template, records created by the Import Runs posting function will use the default specified in the template if the import file does not specify a value for a particular field. This is particularly useful if your entity has a required field that does not have a mapped field in the import file.
- Configure the Record Match and/or Record Post fields if a developer has written code that modifies the standard matching and/or posting behavior.
- If you leave these fields blank, the system uses the default matching and posting logic.
- Follow these steps to specify your own matching logic:
- Enter the .NET assembly name for the Record Match file in the Record Match Assembly Name field.
- Enter the Object Repository location of the Record Match object in the Record Match Object field. (Alternatively, you can click the plus (+) icon to the right of the field to open the Select Object Repository Object dialog. You can use this dialog to browse for an existing object or to add a new object to the repository.)
- Enter the class within the .NET assembly that defines the matching logic in the Record Match Class field.
- Follow these steps to specify your own posting logic:
- Enter the .NET assembly name for the Record Post file in the Record Post Assembly Name field.
- Enter the Object Repository location of the Record Post object in the Record Post Object field. (Alternatively, you can click the plus (+) icon to the right of the field to open the Select Object Repository Object dialog. You can use this dialog to browse for an existing object or to add a new object to the repository.)
- Enter the class within the .NET assembly that defines the posting logic in the Record Post Class field.
- Enter any applicable Comments in the field provided.
- Click the Import Source Columns tab.
- Create an Import Source Columns sub-type record for each column that is contained in the import file.
- Create one entry for each column in the import file, even if you do not intend to import a particular column.
- The Import Source Columns sub-type records must appear in the same order that the columns appear within the import file.
- Follow these steps to create an Import Source Columns sub-type record:
- Open a new sub-type record.
- Enter the name of the column in the Column Name field.
- In the Default Mapping Field, enter the name of the field in the Mapping Entity to which data from this column will be imported. Leave this field blank if you do not want to import data from this column into Aptify.
- Select the Show In Display check box if you want this column's data to appear in the Import Run Details record's Display Data field. If you select the check box for multiple columns, the columns' data is separated by dashes in the Display Data field.
- Enter a Description, if desired.
- If the column is a field that should not be imported, uncheck the Import Default. For example, if a column is an ID field.
- If you want to allow a user to define the default matching criteria for a particular column in the import source file when running the Generic Import wizard, check the Match Column option.
- Click OK to save and close the sub-type record.
- Save and close the Import Sources record.
Running the Generic Import Wizard
Note About Access and Excel Imports
When using the Generic Import wizard with the Aptify Desktop interface to import a Microsoft Access/Excel 2013 or 2016 file, the import may fail if running the 64-bit version of Microsoft Office 2013 or 2016. The error that is generated is: The 'Microsoft.ACE.OLEDB.12.0' provider is not registered on the local machine. The import fails because the user's computer has the 64-bit version of Access/Excel 2013 or 2016 installed, while the Aptify shell requires the 32-bit version.
The current workaround for this issue is to install the 32-bit version of the Access Database Engine Redistributable on the user's computer. You can download the redistributable here:
https://communitybrands.thruinc.net/Publishing/Link.aspx?LinkID=0TIRUUHFR7ACL . Once the Access Database Engine Redistributable is installed, the user's computer must be restarted.
After you have created or identified a suitable Import Source for your import file (see Creating Import Sources), you can run the Generic Import wizard.
Follow these steps:
- Select the Import Runs service.
- Click the Generic Import Wizard icon in the toolbar to launch the wizard.
- This icon is also available in the view toolbar of Import Runs list views.
- This icon is also available in the view toolbar of Import Runs list views.
- Enter the applicable source record in the Import Source field.
- Select the Customize Field Mapping for This Import Run option to review or modify the Import Source Columns for this run.
- Click Next to continue.
- Modify the field mappings as necessary, and then click Next to continue.
- This step is not applicable if you did not check the Customize Field Mapping for This Import Run box.
- You cannot modify the Source Column fields in this dialog.
- To specify a different entity field for the Mapping Field, place your cursor in the appropriate row to enable a drop-down list that contains all of the fields in the entity. Select a different field as necessary.
- If the data in a source column corresponds to a linked field in the Mapping Entity, you can select the Lookup check box. When selected, Aptify performs a lookup in the specified entity to find the record ID that matches the text in the source column.
-
For example, if the data in the Culture source column is text (such as Spanish) and this column maps to a CultureID linked field, then Aptify can lookup the ID for the Cultures record whose name is Spanish and return the appropriate ID. This ID can then populate the CultureID field in the new record created from the import data.
The Lookup feature applies only to entities whose Name field is Unique (in other words, the Unique option is selected on that Entity Fields record that also has the Is Name option selected). This feature does not support entities whose records can share the same name.
-
- You can also modify each row's details by opening the Import Mappings sub-type record. Click within a Description field to display an ellipsis (...) button and then click that button to open the form.
- Specify the import file details in the fields provided and click Next.
- The fields vary depending on the import source's import source type. These fields correspond to the items on the Import Source Type's Input Properties tab.
- For tab-delimited text files, identify the name and location of the Import File.
- For Excel files, identify the name and location of the Import File and the name of the Excel file's Worksheet that contains the import data.
- For Access files, identify the name and location of the Import File and the name of the Table that contains the import data.
- Select the Has Header option if the first row of the import file contains column headings. When selected, the Generic Import wizard ignores the first row in the import file.
- Click Finish to begin the import process.
- Click OK when prompted that the file was imported successful.
- This opens the Import Runs record that the wizard created. Proceed to Matching and Posting Import Results.
Matching and Posting Import Results
This topic describes how to match and post import results.
Follow these steps:
- Open an Import Runs record whose details have not yet been matched or posted.
- After running the Generic Import wizard, the Import Runs record that was created by the wizard opens automatically.
- Click the Import Run Details tab.
- This tab displays all of the rows imported from the import file.
- This tab displays all of the rows imported from the import file.
- Review the results of the import process and resolve any import failures that may have occurred (that is rows whose Status is set to Import Failure).
- If you place the cursor in the row's Matching Record column, an ellipsis (...) button appears (the button is circled in the figure below). Click this button (or simply double-click within the row) to open the corresponding Import Run Details record to view more information about a particular row. See About the Import Run Details Form for details on the form.
- If a match failure occurred or if you want to modify an unintended partial or absolute match, open the row's Import Run Details record and modify the record's contents as necessary.
- Modify the Import Run Details record as necessary to resolve the issue. Errors related to a failure appear on the Import Run Details record's Comments tab.
- When finished, change the record's Status from Import Failure to Imported (the Status field is on the General tab).
- If you place the cursor in the row's Matching Record column, an ellipsis (...) button appears (the button is circled in the figure below). Click this button (or simply double-click within the row) to open the corresponding Import Run Details record to view more information about a particular row. See About the Import Run Details Form for details on the form.
- Click the Match button to display a dialog that contains information about the matching behavior.
- Click OK to begin the matching process.
- Click OK when prompted that the matching process is complete.
- Review the results of the matching process and resolve any matching failures that may have occurred. You can also modify any rows that unintentionally matched with an existing record.
- You can filter the rows that appear in the list using the Show Records radio buttons. For example, to display all records whose Status is Partial, select the Partial Matches option, as illustrated in the figure above.
- With Aptify, absolute matches occur if the Mapped Entity's name field has the Unique option selected in its Entity Fields record and the imported row's name matches an existing record's name.
- With Aptify, partial matches occur if the imported row's name field matches the name of an existing record in the Mapped Entity and the Mapped Entity's name field does not have the Unique option selected in its Entity Fields record.
- Review any partial matches. If the partial match is an actual match, change the row's Status to Absolute to prevent a new duplicate record from being created.
- If a match failure occurred or if you want to modify an unintended partial or absolute match, open the row's Import Run Details record and modify the record's contents as necessary. Errors related to a match failure appear on the Import Run Details record's Comments tab.
- You can filter the rows that appear in the list using the Show Records radio buttons. For example, to display all records whose Status is Partial, select the Partial Matches option, as illustrated in the figure above.
- Click Match to rerun the matching process if you modified any rows.
- After you have completed your final review of the matching results, click the Post button to display a dialog that contains information about the posting behavior.
- Click OK to begin the posting process.
- The posting process completes the import.
- For records that are absolute matches, the posting process updates the existing, matching record with information from the import row. Therefore, note that the posting process may overwrite existing data if a field's value in the import row does not exactly match the field's current value in the record.
- The system creates new records for records that are Partial or Unmatched. The system uses the Record Template you may have specified in the Import Sources record to populate any fields that do not have a corresponding column in the import file.
- Click OK when prompted that the posting process is complete.
- Review the results of the posting process and resolve any matching failures that may have occurred.
- You can display the records that failed to post by selecting the Failure Only option in the Show Records area.
- If a row failed to post, update the Import Run Details record using the following steps:
<oltype="a"> - Open its Import Run Details record.
- Click the Comments tab in the Import Run Details record to review the error.
- Based on the error message, modify the record as necessary.
- Click the General tab and change the Status from Post Failure to the appropriate option (such as Unmatched). Note that if you can also leave the Status set to Post Failure. The posting process also attempts to repost any row that previously failed.
- Save and close the Import Run Details record to return to the Import Runs record.
- Click Post to rerun the posting process if you modified any rows.
- Resolve any additional failures as needed.
- When all rows have been successfully posted, the system grays out the Match and Post buttons on the Import Runs record (since no additional action is required for this import run).
- The system automatically adds the date and time to the End Date field on the Import Runs record's General tab when all records have been posted.
- Save and close the Import Runs record.
- If you do not save and close your record, a prompt will appear indicating that the End Date has been changed. Click Yes to save the End Date to the record.
Administering Metadata Wizards
Aptify provides the ability for administrators and developers to easily create new wizards for Aptify without having to write and compile code in Visual Studio. Aptify's metadata-based wizards are defined as records within the Aptify system, and they utilize Aptify's Form Template and Process Pipeline functionality to display field information within the wizard and to provide conditional logic to create a streamlined and easy-to-follow process for the end user.
Note that this documentation refers to these types of wizards as metadata wizards to differentiate them from code-based wizards that are added to an Entity's Configuration > Actions tab (see Adding Wizards to an Entity and Developing Code-Based Wizards for more information on code-based wizards).
Aptify includes three production metadata wizards (the Membership Enrollment wizard, the Account Manager Transfer wizard, and the Bulk Write-Off wizard). It also includes an example metadata wizard, called the Sample New Company wizard, to illustrate some of the options available when creating a wizard. Note that the Sample New Company wizard is provided as a test wizard only and is not suitable for production use. It cannot be launched from anywhere within the Aptify interface by default to prevent a user from mistakenly running this sample. An administrator or developer can find this wizard in the Wizards service.
This topic provides the following sub-topics on how to create a metadata-based wizard in Aptify:
- Designing Metadata Wizards
- Creating the Wizards Record
- Defining the Wizard User Experience Tab
- Defining the Wizard Scope Tab
- Defining the Wizard UI Platforms Tab
- Linking the Wizard to a Help File
- Defining Wizard Pages
- Defining When Process Flows are Run for a Wizard
- Using Process Flows to Add Functionality and Conditional Paging Logic
- About the Advanced Wizard Options
Designing Metadata Wizards
Before you start defining a metadata wizard in Aptify, it is important to first determine what actions the wizard will perform. The next step is then to identify how you can build the wizard to accomplish these actions using the metadata wizard infrastructure.
This section provides suggestions for how to best design your wizard.
-
Consider Using a Staging Entity: The metadata wizard example in this section describes a simple wizard that operates on a single entity and its sub-types and is based on the standard Opportunities form. However, for more complicated wizard processes that involve updating multiple entities, you should consider using a staging entity. The three metadata wizards included with Aptify use staging entities to store user inputs within the wizard. The staging entity is the target entity for the wizard and the wizard's form template-based steps are tied to that entity. Then as a final step in the process, the wizard runs a process flow that takes the data from the staging entity's record and interacts with multiple entities as necessary.
- For example, the Membership Enrollment wizard uses a MembershipEnrollment staging entity to store the user inputs, such as company data, person data, and the selected membership product. Clicking the Finish button on the wizard creates a MembershipEnrollment record and fires a process flow that uses the data from that record to create a Company, Person, and/or Order as applicable.
- For example, the Membership Enrollment wizard uses a MembershipEnrollment staging entity to store the user inputs, such as company data, person data, and the selected membership product. Clicking the Finish button on the wizard creates a MembershipEnrollment record and fires a process flow that uses the data from that record to create a Company, Person, and/or Order as applicable.
- Review Form Template and Process Flow Documentation: If you have not already, see Administering Form Templates and Managing Process Pipelines as well as this topic on creating wizards to learn about what options are available when constructing a metadata wizard.
- Review Design of Wizards: The three fully functional metadata wizards provided will serve as examples of how an organization can develop its own complex process flows. Many of the process flow steps used by these wizards are rule-based so the text of those rules are available for review by system administrators and developers.
Creating the Wizards Record
Follow these steps to create a new Wizards record for a metadata wizard:
- Open a new record from the Wizards service, which appears in the Aptify Framework Administration application by default.
- Enter a Name for the wizard. This name will appear in the caption for the wizard screen if a Name Culture String is not specified.
- If using localization, specify a Name Culture String for the wizard. See Using Localization Administration.
- Enter a Description for the wizard.
- If using localization, specify a Description Culture String to localize the wizard's description text. See Using Localization Administration.
- Enter the Target Entity.
- This is the entity on whose records the wizard will operate. For example, if you are designing a wizard that will create new Opportunities records, the Target Entity is Opportunities.
- This is the entity on whose records the wizard will operate. For example, if you are designing a wizard that will create new Opportunities records, the Target Entity is Opportunities.
- Save the Wizards record.
- Configure the options on the User Experience tab. See Defining the Wizard User Experience Tab.
- Define the wizard's Scope to determine from where users can launch this wizard. See Defining the Wizard Scope Tab.
- If applicable, specify information about the Help file created for this wizard. See Linking the Wizard to a Help File.
- You must specify the supported user interface platforms for this wizard. See Defining the Wizard UI Platforms Tab.
- Define the steps for the wizard. See Defining Wizard Pages.
- If applicable, specify any process flows that should fire when the wizard is completed or cancelled. See Defining When Process Flows are Run for a Wizard.
See About the Advanced Wizard Options for information on advanced options to modify a wizard's default behavior and/or appearance.
Defining the Wizard User Experience Tab
Complete the fields on the User Experience tab to configure the behavior of the wizard and then save the Wizards record. This tab contains the options described below.
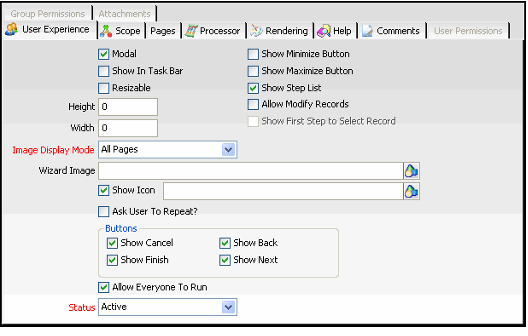
Modal
When selected, the wizard is modal and is displayed at the front of the application (cannot be sent behind another window). This is suitable if you believe a user needs to complete the wizard once launched.
Show In Task Bar
When selected, the wizard is added as an item in the Windows task bar at the bottom of the user's screen. This is only applicable when a user runs the Windows desktop application.
Resizable
When selected, the user can resize the wizard dialog.
Height
When greater than 0, this field specifies the height of the wizard dialog in pixels. However, if left at 0, the recommended and default value, the system automatically calculates the height by choosing the maximum height required to properly display the tallest page within the wizard.
Width
When greater than 0, this field specifies the width of the wizard dialog in pixels. However, if left at 0, the default value, the system automatically calculates the width by choosing the maximum width required to properly display the widest page within the wizard. Note that if the wizard displays an image and/or step list, then you should manually specify the width because the calculated width does not take these items into account (so the calculated width may not be wide enough).
Show Minimize Button
When selected, the minimize button appears in the upper right corner of the wizard dialog and the user can minimize the wizard.
Show Maximize Button
When selected, the maximize button appears in the upper right corner of the wizard dialog and the user can maximize the wizard so it fills the entire screen.
Show Step List
When selected, the wizard includes a step list on its left side that indicates each step in the wizard (it displays the name of each page specified on the wizard's Pages tab). Within the step list, the current step is displayed in bold.
Allow Modify Records
When selected, the wizard can modify existing records in the target entity (as well as create new records if applicable). To load an existing record into the wizard, a user either selects a record from the source view or enters a record in the First Step link box (described below).
Note that if are designing a wizard to operate on a set of records based on selections in a view from the source entity (which may be different from the target entity), you would use the SelectedItems property to pass in the IDs of those records to the wizard. See Using Process Flows to Add Functionality and Conditional Paging Logic for more information on this property.
Show First Step to Select Record
This option is only available when Allow Modify Records is selected. When selected, the wizard displays a link box dialog after the user launches the wizard for the first time. The link box is linked to the wizard's target entity. The user can then enter the existing record to modify. Note that if a user selects a record from a view before launching the wizard, the wizard pre-populates the link box with that record, assuming the wizard is launched from the target entity's view toolbar.
If this option is cleared and Allow Modify Records is selected, the user selects a record from the list view. This record's information is then passed into the wizard. However, the wizard will display the link box for subsequent runs of the wizard (if Ask User To Repeat? is enabled).
Note that if the user does not select any records before launching the wizard, the wizard will create a new record rather than modify an existing record (assuming a user provides values for all of the record's required fields).
Image Display Mode
Determines when the specified Wizard Image is displayed within the wizard. When applicable, the wizard image appears in the upper left corner of the wizard dialog, as shown below. The options are All Pages (on every page), First Page Only (only on first page), and None (do not display a wizard image).
Wizard Image
The Object Repository location of the image to display in the wizard. For best results, a typical wizard image should be around 125 pixels wide by 150 pixels tall.
Show Icon
When selected, the specified icon appears in the caption in the wizard dialog's upper left-hand corner (to the left of the wizard's name). If not specified, the wizard uses the default Aptify "A" as its icon. The text box to the right of the check box identifies the Object Repository location of the icon to display. In the example below, the wizard uses the Aptify Opportunities icon. Note that even if Show Icon is cleared, Aptify will use the specified image as the icon for the wizard when it is available on a view toolbar.
Ask User To Repeat?
When selected, the wizard asks the user if he or she wants to rerun the wizard again after completing an iteration. Note that for wizards that have the Allow Modify Records option enabled, the wizard displays a link box to let the user specify another record in the Target Entity to update (or create a new record by leaving the link box blank).
Show Cancel
When selected, the Cancel button appears in the wizard's button bar across the bottom of the dialog.
Show Finish
When selected, the Finish button appears in the wizard's button bar across the bottom of the dialog.
Show Back
When selected, the Back button appears in the wizard's button bar across the bottom of the dialog.
Show Next
When selected, the Next button appears in the wizard's button bar across the bottom of the dialog.
Allow Everyone to Run
If you want this wizard to be available to all users, select the Allow Everyone to Run option. If the wizard should only be available to a sub-set of users, clear the Allow Everyone to Run option and specify the appropriate Groups and/or Users on the Group Permissions and User Permissions tabs.
Status
When set to Active, the wizard is available for the users who have permission to it. When set to Inactive, the wizard is unavailable for all users.
Defining the Wizard Scope Tab
Complete the fields on the metadata Wizard record's Scope tab to how users can access a wizard. This tab contains the options described below.
Scope
Select one of the following options from the scope of the wizard:
- Global
- Application
- Entity
Linking a Global Wizard to a Dashboard Button
When you select this option, the wizard can be linked to a dashboard button for any dashboard in Aptify. Note that the wizard does not show up in a list view toolbar when this option is selected.
Follow these steps to add a button linked to a wizard:
- Open a new Button Properties record to add a button to a dashboard's button bar.
- See Configuring the Button Bar Component and Editing the Dashboard Button Bar for information on how to create a button bar and add buttons to a dashboard.
- See Configuring the Button Bar Component and Editing the Dashboard Button Bar for information on how to create a button bar and add buttons to a dashboard.
- From the General tab on the Button Properties form, select Generic Data Wizard from the Action Type drop-down field.
- Select the Action Properties tab.
- Enter the Target Entity for the wizard in the field provided. (Each wizard is linked to a Target Entity, as specified in the Wizards record's top area.)
- Select an available wizard from the drop-down list based on the Target Entity you selected.
- Note that only wizards with a scope of Global or Application are available for selection. Application-scoped wizards are only available if you are working with a dashboard linked to the wizard's specified application.
- Note that only wizards with a scope of Global or Application are available for selection. Application-scoped wizards are only available if you are working with a dashboard linked to the wizard's specified application.
- Click OK to save the button.
When a user clicks the button linked to the wizard, Aptify launches the wizard automatically.
Application
The wizard should only be available from a button on a dashboard linked to the specified application.
When you select this option, the wizard can be linked to a dashboard button for any dashboard in Aptify that is associated with the application you specify in the Application field. Note that the wizard does not show up in a list view toolbar when this option is selected. See the discussion on the Global scope above for information on how to link a wizard to a dashboard button.
Entity
The wizard is available from the specified entity's view toolbar. When you select this option, specify the appropriate entity in the Entity field. Typically, this entity is the same as the wizard's Target Entity but it can be different if applicable.
Note that wizards that are based on a user's view selection must be entity-scoped (for example, if you selected the Allow Modify Records option on the User Experience tab but did not select Show First Step to Select Record).
Run From Options
Select or clear the Run From check boxes as necessary.
- By default, the wizard always appears in the service's view toolbar for List views that are not prompted.
- The Aptify web interface supports the ability to control the availability of wizards using the Run From options. In previous releases, the Aptify web interface does not support the Run From options.
-
If you want the wizard to appear in the service toolbar (that is, the toolbar that appears in the main display window when a service is selected), select the Run From Entity Browser option. If you do not want the wizard to appear in the service toolbar, clear this option.
Any wizard that pulls data from a view should have the Run From Entity Browser option cleared.
This option is supported in the web interface. However, when this option is selected, the wizard is available in the web interface Quick Search, not in the entity browser.
-
If you want the wizard to appear in the view toolbar for a temporary list view, select the Run From Temporary View option. If you do not want the wizard to appear for temporary views, clear this option.
A temporary view is a list view that is constructed outside of the standard Views entity. This includes:
- Entity list views that appear under a related service tab of a form. One example is the Templates tab on the Form Template Parts form that displays the templates to which the part applies.
- Dashboard entity list views that are constructed using a custom SQL statement rather than an existing system view.
- If you want the wizard to appear in the view toolbar for a prompted list view, select in the Run From Prompted View option. If you do not want the wizard to appear for prompted views, clear this option.
Defining the Wizard UI Platforms Tab
The Wizard UI Platforms tab lists the Aptify user interface (UI) platforms that can be used to run this wizard. This topic describes how to add UI Platform records to this list.
New wizards cannot be run until supported UI platforms are defined.
Follow these steps:
- Determine whether you want this wizard to be available on just the Aptify web interface, just the Aptify Windows Desktop client, or both.
- Open a new Wizard UI Platforms Record.
- In the UI Platform ID field, enter the platform ID for a UI platform you wanted to support for this wizard.
- Enter HTML5 Web to add support for the Web Interface.
- Enter Windows Desktop Client to add support for the Desktop client.
- Click the link in the field to open the associated UI Platforms record. See About the UI Platforms Form.
- Click OK to save the record or click OK and New to open a new record to add support for the other UI platform to this wizard.
Linking the Wizard to a Help File
If applicable, you can link the wizard to a Microsoft CHM file that users can access while running the wizard.
To add online help for new wizard, an organization needs to complete these steps:
- Write help documentation for the application and compile it into a Microsoft HTML (CHM) file.
- Add the CHM file to the Object Repository.
- Open the Wizards record and click the Help tab.
- Select the Show Help option.
- When selected, a Help button appears in the button bar along the bottom of the wizard. If a user clicks this button, the system opens the Help file specified in the Help Object field at the location specified by the Help URL field.
- Specify the Object Repository location of the CHM file in the Help Object field.
- Specify the name of the HTML page (included within the CHM file) that contains information about the specified wizard in the Help URL field.
- Save the Wizards record.
Defining Wizard Pages
The details of a metadata wizard are specified in one or more pages. By default, the wizard moves through the pages in order as specified on the Wizards record's Pages tab, but as described below, you can also add conditional logic via process flows to specify a next page to display based on a user's action.
Follow these steps to add pages to the wizard:
- Open the Wizards record.
- Click the Pages tab.
- Click the New button in the toolbar to open a new Pages record.
- Enter a Code for the page.
- This code can be referenced in process flows to determine which page to display based on a particular action. When assigning codes to steps, Aptify recommends that you assign the steps a letter in order (starting with A). See the Sample New Company wizard, which is included with Aptify, for an example of this convention.
- Enter a Name for the step.
- This name appears in the wizard's step list (if the wizard is configured to display a step list).
- Enter a Display Culture String for this step if localized users will run this wizard. The culture string you provide will be used to localize this step's name in the wizard's step list. See Using Localization Administration for more information on localization.
- Enter a Description of the step.
- Specify the Form Template that the wizard should use to display the content for this step.
- The form template contains the fields and text you want to display for a particular step. This field links to the Form Templates service.
- If you want to link a wizard page to an existing form template that is already used on a form in Aptify, create a copy of that template first and then link the copy to the wizard page. Also, use the Form Template Copy wizard to create a copy of the form template and its form template parts – do not clone the form template since this will not clone the linked form template parts and both templates will use the same parts, which can have undesirable side effects. See Using the Form Template Copy Wizard for information on how using the wizard.
- You can also create new Form Templates from scratch and then add fields and other parts using the Visual Designer (from the Form Templates record's Visual Designer tab). See Creating a New Form Template for details.
- You can also specify layout control logic on a page's form template to be used by the wizard. See Adding a Layout Control for details.
- Set the Width of the wizard page (or leave it at 0 to use the width from the specified Form Templates record).
- When greater than 0, this field specifies the width of the page within the wizard (in pixels). However, if left at 0, the system uses the default width from the Form Templates record instead. Note that if the wizard's width is set to 0, the widest step will set the width for the wizard.
- Set the Height of the wizard page (or leave it at 0 to use the height from the specified Form Templates record).
- When greater than 0, this field specifies the height of the page within the wizard (in pixels). However, if left at 0, the system uses the default height from the Form Templates record instead. Note that if the wizard's height is set to 0, the tallest step will set the height for the wizard.
- You can specify this page as a finish page by selecting the Is Finish Page option.
- Enabling this option allows for more complex metadata wizard implementations.
- Enabling this option allows for more complex metadata wizard implementations.
- Enter any additional information on the Comments tab.
- Specify any process flows that should fire based on a user's action within the wizard (clicking Before, Next, Finish, or Cancel). See Using Process Flows to Add Functionality and Conditional Paging Logic for details.
- Repeat the steps above to add other pages to the wizard.
When finished, you should have a Pages record for every page of the wizard. In the example shown below, an Opportunity Knocks wizard that creates new Opportunities records has four pages (labeled A to D).
A user who runs this wizard sees the following pages:
-
Page 1: Enter general opportunity information (corresponds to fields on the top area of the Opportunities form).
-
Page 2: Enter Status details for the opportunity (corresponds to fields on the Opportunities form's Status tab).
-
Page 3: Specify Line Items for the opportunity, if known (displays sub-type control for Opportunity Line Items sub-type).
-
Page 4: Enter additional comments (added to Opportunities record's Comments tab).
Defining When Process Flows are Run for a Wizard
If desired, you can configure the wizard to run a Process Flow when a user either finishes or cancels a wizard. For example, when the user completes a wizard, it can automatically run a process flow to generate a related record, such as a Contact Log or Task.
These settings are specified in the top area of the Wizards record's Processor tab.
See How to Create a Process Pipeline for information on how to create Process Flows in Aptify.
Follow these steps to configure when a wizard runs a process flow:
- Open the Wizards record.
- Click the Processor tab.
- Configure the Finish Mode to specify what action to take when a user clicks the Finish button on the wizard. The available options are:
- Save Entity: Save the record that the user is creating or updating via this wizard.
-
Run Process Flow: Run the specified Finish Process Flow. When this step is selected, the new or existing record loaded into the wizard is not saved before running the process flow. In this case, the process flow will perform a save operation to commit information to the database (based on the wizard's design).
- Note that if you select this option, the specified process flow must save the record stored in the wizard's GE Object (to successfully create or update the record). For example, you could use the Run Process Flow option to execute a process flow that creates a sub-type record for the wizard's record (via a standard Aptify sub-type CRUD (Create, Read, Update, and Delete) component) and then saves the top level record as part of that operation.
- If you select the Run Process Flow option, the final step of the Process Flow should close the wizard using a Set Wizard Result step. The wizard will not close automatically.
- Save and Run Process Flow: Save the record that user is creating or updating via this wizard first and then run the specified Finish Process Flow.
- If you selected a Finish Mode of Run Process Flow or Save and Run Process Flow, enter the process flow to execute when a user clicks the Finish button on the wizard in the Finish Process Flow field.
- The wizard can pass its GE object, which contains all user inputs, to the process flow as an Input Property called GEObject. A process flow can then retrieve these values and use them as needed (such as to populate other records).
- For example, an organization might want to generate a Status Report when a new Opportunities record is generated from a New Opportunity wizard. In this case, using the wizard's GEObject as an input property, the Generate Status Report process flow can use a rule or the Value Retriever component to obtain the Opportunity ID, AccountManagerID, and other fields to pass into the Create Opportunity Status Report Component. See the example below.
- Configure the Cancel Mode to specify what action to take when a user clicks the Cancel button on the wizard. The available options are:
- Close Form: Close the wizard without performing any additional actions.
- Run Process Flow: Run the specified Cancel Process Flow. When this step is selected, the process flow runs before the wizard is closed.
- Close Form and Run Process Flow: Close the wizard and then run the specified Cancel Process Flow.
- If you selected a Cancel Mode of Run Process Flow or Close Form and Run Process Flow, enter the process flow to execute when a user clicks the Cancel button on the wizard in the Cancel Process Flow field.
- As with the Finish Process Flow, the wizard can pass its GE object, which contains all user inputs up to the point when it was cancelled, to the process flow as an Input Property called GEObject. A process flow can then retrieve these values and use them as needed.
- You can define a processor sub-class for the wizard. If you need to define a processor sub-class, enter information the following fields in the Processor Sub-Class area:
- In the Object field, specify the Object Repository location of a wizard-specific or organization-specific processor.
- Aptify includes a standard processor that provides the business logic for the wizard (this logic applies regardless of whether the wizard is run from the Windows application or the Aptify web interface).
-
If necessary, a developer can implement his or her own processor object to change any of this logic.
Any new processor object should be a sub-class of the base AptifyWizardProcessor object. See the Aptify Software Development Kit (SDK) for information on this object.
- In the Class field, specify the fully qualified namespace/class name that provides the processor logic contained in the Processor Object.
- In the Assembly field, specify the name of the Processor Object's assembly.
- In the Object field, specify the Object Repository location of a wizard-specific or organization-specific processor.
- You can configure the Start Mode to specify what action to take when a user clicks the Start button on the wizard. The available options are:
- Start Form: Start the wizard without performing any additional actions.
- Run Process Flow: Run the specified Start Process Flow. When this step is selected, the process flow runs before the wizard is started.
- Start and Run Process Flow: Start the wizard and then run the specified Start Process Flow.
- If you selected a Start Mode of Run Process Flow or Start and Run Process Flow, enter the process flow to execute when a user clicks the Start button on the wizard in the Start Process Flow field.
-
The wizard can pass its GE object, which contains all user inputs, to the process flow as an Input Property called GEObject. A process flow can then retrieve these values and use them as needed (such as to populate other records).
-
- Save the Wizards record.
Using Process Flows to Add Functionality and Conditional Paging Logic
The Wizard infrastructure supports the ability to fire a process flow based on a user's interaction with the buttons at the bottom of the wizard. Each wizard page can be linked to one or more process flows on the Pages record's Process Flows tab.
A wizard designer can specify that a process flow should execute based on one of the following events:
- Before Next: Fire the specified process flow after the user clicks the Next button but before proceeding to the next page.
- After Next: Fire the specified process flow after the user clicks the Next button and after proceeding to the next page.
- Before Back: Fire the specified process flow after the user clicks the Back button but before proceeding to the previous page.
- After Back: Fire the specified process flow after the user clicks the Back button and after proceeding to the previous page.
- Before Finish: Fire the specified process flow after the user clicks the Finish button but before completing the wizard.
- After Finish: Fire the specified process flow after the user clicks the Finish button and after completing the wizard.
- Before Cancel: Fire the specified process flow after the user clicks the Cancel button but before canceling the wizard.
- After Cancel: Fire the specified process flow after the user clicks the Finish button and after cancelling the wizard.
One of the primary uses for this functionality is to enable conditional logic to move between pages in a non-linear fashion. For example, in the sample Opportunity Knocks wizard described above, a user may not have Line Items to enter for a new opportunity. In this case, the user experience could be improved by first asking the user if he or she has Line Items to enter. If the user clicks Yes, then the wizard should display the Line Items page; if the user clicks No, then the wizard should skip the Line Items page (step 3) and proceed directly to Step 4.
Follow these steps to link a process flow to a trigger event within the wizard:
- Open the Wizard Pages record to which you want to attach a Process Flow.
- For the Line Items conditional logic described in this section, the designer would attach the process flow to Page 2 (code B) so that it fires before proceeding to Page 3, the Line Items page.
- Click the Process Flows tab.
- Open an new Process Flows record.
- Select the event Type from the drop-down list.
- In the example below, the selected Type is Before Next, since the designer wants to display the "Do you want to enter Line Items?" message box before proceeding to the next step.
- Specify the Process Flow to fire when the trigger event (specified in the Type field) occurs.
- See How to Create a Process Pipeline for general information on how to create Process Flows in Aptify. The information below provides information that is specific to creating a process flow for wizard pages.
- Process Flows attached to a wizard page typically use one or more input properties that are passed in from the wizard. Note that you should name the input properties exactly as shown below (they are case sensitive).
- GEObject: This object stores all of the user inputs within the wizard up until the time the process flow executed.
- Result: This object specifies the wizard's current position within the pages.
- SelectedItems: If the wizard is launched from a list view, this property passes in the IDs of the records selected in the source view (or all records in the view if none are selected). This property is used by wizards that operate on a set of records passed in from a view, such as the Account Manager Transfer wizard and the Bulk Write-Off wizard. Review the configuration for those wizards within Aptify for examples of how this property is used by a metadata wizard.
- To control the wizard's action following the execution of the process flow, the process should include one or more steps that use the Set Wizard Result component. This component provides instructions to the wizard for how it should proceed. The standard result options include continue to a specified page, finish the wizard, cancel the wizard, display an internal error message, make no change to the default paging logic, and open the wizard's on-line Help window.
- When passing in the ResultObject to a Set Wizard Result step, you must enter the Context Object that is named exactly as Result.
- See the Test Process Flow that is included with Aptify as part of the Sample New Company wizard for an example.
- The figure below illustrates a Prompt for Line Items process flow that fires based on the Before Next trigger when a user clicks Next on Page 2 of the Opportunity Knocks wizard. The first step of this Process Flow is a Message Box that asks the user if there are line items to enter. If the user selects Yes, the process flow proceeds to the Show Line Items Page step that instructs the wizard to proceed to page C (that is, the selected Result is Continue to Specified Page and the GoToPageCode is set to C).
- Click OK to save and close the Process Flows record.
- Click OK to save and close the Pages record.
- Save the Wizards record.
About the Advanced Wizard Options
The metadata wizard infrastructure provides a standard processor and rendering objects that control the behavior of the wizards and their appearance. If necessary, a developer can create his or her own processor and/or rendering objects to modify the features and functionality provided by the standard objects.
Processor Object
Aptify includes a standard processor that provides the business logic for the wizard (this logic applies regardless of whether the wizard is run from the Windows application or from Aptify Web Access). If necessary, a developer can implement his or her own processor object to change any of this logic. Note that any new processor object should sub-class the base AptifyWizardProcessor object. See theAptify Software Development Kit (SDK)for information on this object.
Once this processor object has been created, the developer or an administrator adds it to the Object Repository and specifies the files details on the Wizards record's Processor tab, including:
- Processor Object: This field specifies the Object Repository location of a wizard-specific or -organization-specific processor.
- Processor Class: This field specifies the fully qualified namespace/class name that provides the processor logic contained in the Processor Object. "
- Processor Assembly: This field specifies the name of the Processor Object's assembly.
Rendering Objects
Aptify provides a standard user interface model for rendering metadata wizards within Aptify's Windows application and Aptify Web Access. However, if necessary, a developer can implement his or her own Windows or Web object to change the appearance of a wizard or wizards. Note that any new rendering object should sub-class the base Aptify GenericWizardForm class. See the Aptify Software Development Kit (SDK) for information on this class.
Once this rendering object has been created, the developer or an administrator adds it to the Object Repository and specifies the files details on the Wizards record's Rendering tab (complete the set of Windows or Web fields depending on the nature of the object):
- Object (Windows or Web): This field specifies the Object Repository location of a wizard-specific or organization-specific user interface design for the wizard.
- Class (Windows or Web): This field specifies the fully qualified namespace/class name that provides the logic contained in the rendering object.
- Assembly (Windows or Web): This field specifies the name of the rendering object's assembly.
Administering Microsoft Word Templates
Aptify integrates with Microsoft Word to provide a mail merge wizard that loads view data into pre-defined templates, which are stored in the Object Repository. These templates easily generate targeted letters and labels that can improve the efficiency with which your organization communicates with its customers and/or members.
Aptify's integration with Microsoft Word requires Microsoft Word 2003 or later
The following is an overview of how to use Microsoft Word mail merge templates with Aptify:
- The Aptify MS Word Integration wizard is available for the Persons entity by default. If necessary, an administrator can add the wizard to one or more additional entities. See Adding the MS Word Integration Wizard to an Entity for more details.
- An administrator adds one or more Word Template Categories.
- An administrator creates one or more Word Templates and adds them to the Object Repository.
- A User creates a list view that displays the records to include in the mail merge document.
-
The user launches the Aptify MS Word Integration wizard and selects a template to create a mail merge document using the data from the view.
The Aptify MS Word Integration wizard can be run from any list view (including prompted views and temporary views). Other view types are not supported.
The following sub-topics contain instructions on how to perform the following tasks:
- Adding the MS Word Integration Wizard to an Entity
- Creating Word Template Categories
- Creating Word Templates
- Editing Word Templates
- Using Word Templates
- Specifying a Default Path for Temporary Data
Adding the MS Word Integration Wizard to an Entity
The Aptify MS Word Integration wizard is available for the Persons entity by default. If you only plan to use the Aptify mail merge functionality with Persons, you do not need to complete this procedure.
However, an administrator can add the Aptify MS Word Integration wizard to any entity in the system by following these steps:
See Adding Wizards to an Entity for detailed instructions on how to add a wizard to an entity.
- Open the Entities record for the entity and click the Configuration > Actions tab.
- Open a new Actions record and enter the following values:
- Name: Mail Merge Wizard (or whatever text you want to display in the tool text that appears when a user places a mouse cursor over the wizard icon in the view toolbar)
- Action Assembly: AptifyMSWordIntegration
- Action Class: Aptify.Framework.MicrosoftWord.TemplateWizardForm
- Action Object: DataModules.Aptify MS Word Integration
- Description: Enter a description if desired.
- Icon: Specify an icon from the Object Repository to use for this wizard in the entity's toolbar. Note that the system will use the standard wizard icon if you leave this field blank. Icon Small is currently not implemented.
-
Run From options: Clear the Run From Entity Browser option; the wizard cannot be run the entity browser. However, you can select the Run From Temporary View and Run From Prompted View options — the Aptify MS Word Integration wizard can be run from temporary views or prompted views.
- Click OK.
- Save and Close the entity.
Creating Word Template Categories
For each entity to which you added the wizard, an administrator needs to link it to one or more top-level Word Template Categories before a user can launch the Aptify MS Word Integration wizard from that entity. Follow these steps:
- Expand the Aptify Framework Administration application.
- Locate the Word Template Categories service.
- Open an existing record or create a new record.
- For new records, specify a category name. If this record corresponds to a sub-category of an existing category, specify the parent category in the Parent field.
- For new records, specify a category name. If this record corresponds to a sub-category of an existing category, specify the parent category in the Parent field.
- Click the Entities tab.
- Add a sub-type record for each entity that you want to link to the category.
- When linking an entity to a sub-category, note that the category will not be available in the wizard unless the entity is also linked to the parent category.
- When linking an entity to a sub-category, note that the category will not be available in the wizard unless the entity is also linked to the parent category.
- Save and close the record.
Creating Word Templates
Administrators create new templates and add them to the Object Repository. Follow these steps:
- Open or create a view of a service that has the Aptify MS Word Integration wizard available.
- Select the wizard's icon from the view toolbar. This opens the Aptify MS Word Integration dialog.
- The wizard will not open if this entity does not have at least one top-level Word Template Categories associated with it.
- Select a category from the list on the left-hand side of the dialog.
- Right-click in the Template gray area and select Create Template from the pop-up menu.
- A blank Microsoft Word document opens. Use this document to design the Mail Merge template.
-
Microsoft Word includes a Mail Merge toolbar that provides easy access to mail merge features. This includes inserting fields into the document and previewing the results. The Mail Merge toolbar is circled in the figure below.
Microsoft Word can only use the entity fields that are included in the View from which you launched the wizard. Therefore, any field you add to the template must also be present in the view which users will use as the source for their mail merge documents.
-
- Save the Microsoft Word Mail Merge document to a location on your local computer or on the network.
- Close Microsoft Word and a New Word Template Record window appears automatically.
- Enter a Name and Description for the template.
- Add the entity from which you launched the wizard to the Entity section of the form.
- This links the template to an entity, so the template appears as a selection in the Aptify MS Word Integration wizard when launched from this entity.
- This links the template to an entity, so the template appears as a selection in the Aptify MS Word Integration wizard when launched from this entity.
- Add the template you just created to the Object Repository by clicking the icon to the right of the Repository Object field. (This icon is circled in the figure below.)
- In general, the template file should be placed in the same Object Repository Package that stores the rest of your organization's configurations.
- Follow these general steps to add the template to the repository:
-
- Click the Object Repository icon to open the Select Object Repository Object dialog.
- Double-click the Context where you want to store the template.
- Double-click the Package in that Context where you want to store the template.
- Double-click Text File as the Object Type.
- Click the New button to open an Open dialog.
- Browse to the location where you saved the new template file, select the file, and click Open.
-
Click Yes if prompted by Microsoft Word to run a specified SQL command, as shown in the figure below. The template is then added to the Select Object Repository Objects dialog.
Microsoft Word uses a temporary comma separated value (CSV) file, which Aptify generates based on the data in the view. By default, Aptify stores this CSV file in the Aptify Program Files directory. You can specify a different location for the CSV files, if desired. See Specifying a Default Path for Temporary Data for details.
- Select the template from the Select Object Repository Objects dialog and click OK. This automatically populates the Repository Object field on the New Word Templates record in the following format: Package Name.Object Name.
- Click OK to save and close the record.
-
Click Exit to close the Aptify MS Word Integration wizard.
You can also add any pre-existing templates manually from the Word Templates service (located in the Aptify Framework Administration application). See About the Word Templates Form for more information on this form.
Editing Word Templates
If you try to open an existing mail merge template directly in Microsoft Word, you can modify the text of the document but you will not be able to change any of the linked field information (since the document will not have access to the Aptify database).
Follow these steps to edit a template:
- Copy the original template document to a location on your local computer or network.
- You can download the template from the Object Repository, if necessary.
- Create or open a view of an entity linked to the template you want to modify.
- Launch the Aptify MS Word Integration wizard.
- Open the template you want to modify from the wizard.
- Modify the template as necessary.
- Overwrite the original template on your local computer or network with this new version of the document.
- In other words, save the new template with the same name and in the same location as the old template to overwrite it.
- Close Microsoft Word and the Aptify MS Word Integration wizard.
- Open the template's Object Repository Objects record from the Object Repository Administration dashboard.
- Click the Local Filename icon to open the Select File dialog.
- Browse to the location where you saved the updated template file, select the file, and click Open.
-
Save and Close the Object Repository Objects record.
- Click Yes if prompted by Microsoft Word to run a specified SQL command, as shown below.
- Click Yes if prompted by Microsoft Word to run a specified SQL command, as shown below.
- To test that the new template appears when you run the wizard, complete these steps:
- Close and reopen Aptify.
- Launch the Aptify MS Word Integration wizard.
-
Open the template you modified and confirm that the modified version appears.
You can also manually download the latest version of updated files manually without having to close and reopen Aptify. See Downloading an Object or Object Package Using the Dashboard for details.
Using Word Templates
The following steps describe how a user can open an existing template to create a mail merge document in Microsoft Word using Aptify view data:
- Open or create a list view of an entity that has the Aptify MS Word Integration wizard available.
- To function correctly, this view must contain all of the fields that are included in the mail merge template.
- Click the mail merge icon in the view toolbar to open the Aptify MS Word Integration wizard.
- Select a category to display the list of templates in that category.
- Select a Word Template from the list and click Show.
- Microsoft Windows opens automatically and imports the data from the current view.
- Use the Microsoft Word Mail Merge toolbar to create documents or printouts customized for each record in the view.
- For example, clicking the View Merged Data button fills in the field variables with the corresponding field data from the view. For example, the following figure shows the merge results for the record in the view.
- Refer to Microsoft Word's on-line for more information on how to use Microsoft Word's Mail Merge features.
- For example, clicking the View Merged Data button fills in the field variables with the corresponding field data from the view. For example, the following figure shows the merge results for the record in the view.
- Close Microsoft Word when finished.
- Select another template to open or click Exit to close the Aptify MS Word Integration wizard.
Specifying a Default Path for Temporary Data
When a user opens a mail merge template, Aptify exports the view information to a temporary comma separated value (CSV) file, which Microsoft Word then uses to import the data.
By default, Aptify stores this CSV file in the Windows Temp directory. If desired, you can specify a different location for the CSV files by using the MergeFolder attribute in the Word Templates entity.
Follow these steps to configure this attribute:
- Expand the Aptify Framework Administration application.
- Locate the Entities service.
- Open the Word Templates record in the Entities service.
- Click the Configuration > Attributes tab.
- Open a new Attributes sub-type record, enter the following information, and click OK:
- Name: MergeFolder
- Value: The location of each user's local computer where you want to temporarily store the CSV files generated by the Aptify MS Word Integration wizard. End the path with a back slash. For example, C:_ or _C:\Windows\Temp.
-
Description: This field is optional.
- Save and Close the Entities record.
- Close and restart Aptify for this change to take effect.
Using the Object Viewer
The Object Viewer is an alternate way of accessing data within records. Using the Object Viewer, a user may see all data contained in all fields in the table on which the record is based, not just the data that is displayed on the regular form. Most of this data may also be updated at this level, including ID fields. The only fields which may not be edited are virtual fields and linked fields.
The Object Viewer does not make use of any field validation that may exist, such as selection of a value from a list or selection of a linked record. In other words, the Object Viewer completely bypasses any business logic set up for that service and thus could result in a risk to data integrity if users do not fully understand the system. This functionality is therefore most appropriate for power users who are familiar with the logic behind the setup of records in that service.
This topic covers the following sub-topics:
- Granting Permissions for Object Viewer
- Opening the Object Viewer
- Printing Object Viewer Information
- Updating Object Viewer Fields
- Updating Sub-Type Records from the Object Viewer
- Using Record History from the Object Viewer
Granting Permissions for Object Viewer
In order to use the Object Viewer, the user must be granted Object Viewer permissions. These are set up similar to all other entity security permissions on the Security tab of the Entities form. Users and groups are granted permission to the Object Viewer by selecting the Allow Object Viewer option on the Entity Group or Entity Users Permissions records. Users or Groups granted Object Viewer permissions must also be granted Read permission so that users may access the data. If the users require the ability to change data through the Object Viewer, they must also be granted Edit permissions.
Opening the Object Viewer
To open the Object Viewer, right-click a row in a view of a service to which Object Viewer permissions have been granted and select Object Viewer from the context menu. The View Object form displays, listing all fields defined for the entity and the values in each field for that record.
Printing Object Viewer Information
Click the Print button to launch the Report wizard. The Object Viewer displays the following print options:
- List: This report option is not supported for the Object Viewer.
- Detail: Select this option to print out the top-level record's field information. Note that each field is printed on a separate row.
- Export: Select this option to export information from one or more fields in the top-level record to a text file that can be imported into another program, such as Microsoft Word or Microsoft Excel.
See Running the Standard Reports for more information on these standard reports.
Updating Object Viewer Fields
Follow these steps to update a field in the top-level record from within the Object Viewer:
You can only update those fields that are marked with a green arrow icon. Fields with a blue arrow icon are not updateable.
- Double-click a row to display the Edit Field dialog box.
- This dialog box displays the field characteristics (such as field type, name, and length), as well as the current value. Name, Type, and Length are displayed only for informational purposes and are read-only.
- This dialog box displays the field characteristics (such as field type, name, and length), as well as the current value. Name, Type, and Length are displayed only for informational purposes and are read-only.
- Update the field value, as necessary.
- Click OK to return to the View Object form.
- Click Save or Save and Close to save your changes.
Updating Sub-Type Records from the Object Viewer
All sub-type entities are displayed in the list view on the left side of the Object Viewer form. If any sub-type records exist, you can also expand the list view to display these records.
Expanding the sub types menu displays a list of all the records for that sub-type. These records may be selected and updated in the same manner as the main (parent) record.
Using Record History from the Object Viewer
The View Object form is also used to display different versions of a record through the Record History form. When viewing Record History for a record, each version of the record is listed in the grid. Double-clicking one of the rows opens the Object Viewer for that version of the record, displaying the data in the record in the state it was saved at that point in time. All fields are read-only when viewed from a Record History row.
This functionality is available whether or not the user has been granted Object Viewer permissions for that entity. See Opening the Record History for more information on Record History.
Administering Pending Changes
With Aptify, a user can save changes as pending and specify a date and time for when these changes should be applied to a record. This feature uses Aptify's Application Server and Scheduled Task functionality to execute the data changes after the specified date without requiring any user intervention. See Using the Save as Pending Button for information on how users can save pending changes to be applied at a later date.
Your Aptify installation must include one or more Application Servers to use the Pending Changes feature. See Managing Scheduled Tasks for information on Application Servers and Scheduled Tasks.
The following is an overview of the process:
- An administrator creates a Pending Changes Scheduled Tasks record that defines when pending changes will be processed (for example, every night).
- Specify the Update Pending Changes PF process flow in Process Flow link box.
- There are no Process Flow Inputs required for this Process Flow.
- Specify other information on the Scheduled Task as necessary. See Creating a Scheduled Task for more information about creating scheduled tasks.
- Users save pending changes as necessary, specifying a future date and time for when the changes should be applied to the record. When a user saves a change as pending, Aptify creates an Approved Pending Changes record. The Pending Changes record is accessible to administrators in the Framework application.
- Note that Pending Changes records are automatically generated and cannot be modified directly. See About the Pending Changes Form for more information on this form.
- Also note that when a pending change is in affect for a record, the Alerts icon turns red on the record's toolbar to notify all users that a pending change exists for the record. See Creating Alert Types for more information about this service.
- At the specified date and time, the Scheduled Task creates a Process Flow Runs record that fires the Update Pending Changes PF process flow.
- The assigned Application Server executes the Process Flow Runs record to apply changes from any Pending Changes records with an Approved status that have a scheduled date in the past. After the changes have been applied, the Pending Changes record's Status is set to Posted automatically.
Administering Record Templates
By default, users can create record templates and manage their own record template preferences using the record template dialogs. This functionality is described in Working with Record Templates.
In addition, the record template infrastructure is also used for view templates. As with record templates, users can create view templates as needed, but record template preferences are not applicable to view templates.
Administrators can also manage record template functionality for users directly from the Entity Record Templates services, which appear under the Aptify Framework Administration application. For more information on these services, see About the Entity Record Template Categories Form, About the Entity Record Template User Preferences Form, and About the Entity Record Templates Form.
Each time a user creates a new Record Template (this includes a view template), Aptify automatically creates an Entity Record Templates record that stores the relevant details about that template.
This topic provides an overview of how to perform the following administrative tasks for record and view templates:
- Creating Record Template Categories
- Administering Record Template Security Settings
- Editing a Record Template Using the Save Template Dialog
- Editing a Record Template Using the Entity Record Templates Record
Creating Record Template Categories
Entity Record Template Categories apply to both record templates and view templates. By default, users can create new Entity Record Template Categories directly from the Save Template dialog by clicking the New button to the right of the Category field, as shown below.
In addition, you can create new categories directly from the Entity Record Templates Categories service, following these steps:
- Expand the Aptify Framework Administration application heading in the Navigation Bar.
- Right-click the Entity Record Template Categories service and select New Entity Record Template Categories Record from the pop-up menu.
- Enter a Name for the category.
- Enter a Description for the category (this is optional).
- Specify the Entity to which this category applies.
- For example, if this category applies to templates for the Persons service, enter Persons in the Entity field.
- For view template categories, enter Views in the Entity field.
- Leave the Parent field blank. (This field is reserved for future use.)
- Specify a Rank, if desired.
- Rank determines the order in which category tabs appear in the Select A Record Template dialog from left to right. The General tab always appears first.
- By default, the Rank for new Entity Record Template Categories is set to 0. With this setting, categories appear on the Select A Record Template dialog in ascending order based on a category's record ID.
- Leave the User Flag and User Value fields blank. (These are reserved for future use.)
- Specify the security settings for the category.
- If you want this category to be visible for all users, select the Available To All Users? option, if necessary.
- If you want this category to be available to only specified groups and/or users, select the Available To All Users? option and add the specified groups and/or users to the Group Permissions or User Permissions tab.
- See Administering Record Template Security Settings for more information on setting Group and User permissions for Record Templates and categories.
- Save and Close the record.
Administering Record Template Security Settings
By default, users create and manage their own Record Template preferences, and the templates and categories created by users and administrators are available to all users.
However, the system also allows administrators to create and manage user preferences and to limit access to Record Templates and categories to a specific set of users.
This topic provides the following sub-topics for information on how an administrator can manage Record Template functionality for system users.
- Managing Record Template User Preferences
- Specifying User Access for a Record Template or Category
- Creating Templates for Multiple Users
Managing Record Template User Preferences
The system automatically creates an Entity Record Template User Preferences record the first time a user modifies the default Record Template Options within the Select A Record Template dialog. This record stores the user's preferences, such as the list of services for which the dialog appears automatically.
Entity Record Template User Preferences do not apply to view templates.
An administrator can modify these preferences as necessary to control the Record Template behavior for a particular user. See About the Entity Record Template User Preferences Form for more information.
In addition, an administrator can define a user's preferences even before the user accesses the Select A Record Template dialog for the first time.
Follow these steps to create an Entity Record Template User Preferences record for the user:
- Expand the Aptify Framework Administration application heading in the Navigation Bar.
- Right-click the Entity Record Template User Preferences service and select New Entity Record Template User Preferences Record from the pop-up menu.
- Specify the system user in the User field.
- Configure Show Template on New and Show Template Scope to determine when the Select A Record Template dialog will appear for the user:
- To disable the dialog, clear the Show Template on New option and set Show Template Scope to Global.
- To enable the dialog for all services, select the Show Template on New option and set Show Template Scope to Global.
- To enable the dialog on a per-service basis, select the Show Template on New option and set Show Template Scope to Service. If you select this option, you must also configure the Service Details tab.
- Leave the Hide Template Help field at its default setting. This field is reserved for future use.
- Enter optional Comments in the field provided.
- Follow the steps below that corresponds to the Show Template Scope value you selected:
- If you set the Show Template Scope field to Service, proceed to Step 8.
- If Show Template Scope is set to Global, Save and Close the record. No additional configuration is necessary.
- Click the Service Details tab.
- Create a Service Details record to specify a default Record Template for a service or to specify that the Select A Record Template dialog should appear automatically for a service.
- Click the New Record... icon.
- Specify a service in the Service field.
- Configure the remaining field depending on the behavior you want to implement:
- To show the dialog for each new record opened in the service, leave the Default Template field blank and select the Show Template Dialog When Creating New Records? option, as shown below.
- To display a default template for the service, specify a template for that service in the Default Template field and clear the Show Template Dialog When Creating New Records? option, as shown below.
- Click OK and add additional Service Details records as necessary.
- Save and Close the record.
If you want to assign the same preferences to a large number of users, you can create a record template for the Entity Record Template User Preferences service and then use that template to quickly generate user records.
Specifying User Access for a Record Template or Category
By default, all users have access to new Record Templates and Record Template Categories. Follow these steps to limit access to a template or category to a specified list of users:
These instructions apply to both record templates and view templates.
- Open an Entity Record Template or Entity Record Template Categories record.
- Clear the Available To All Users? option.
- Click the Group Permissions tab.
-
Add Groups as necessary to allow members of these groups to access the template or category.
The members of the Groups you add to this tab will have Read and Edit permissions for the template or category, regardless of which permission check boxes you select. The Read, Edit, and Delete check boxes are reserved for future use.
- Click the User Permissions tab.
- Add Users as necessary to allow access to the template or category.
-
You do not need to add a user if he or she is already a member of one of the groups you added to the Group Permissions tab.
The Users you add to this tab will have Read and Edit permissions for the template or category, regardless of which permission check boxes you select. The Read, Edit, and Delete check boxes are reserved for future use.
-
- Save and Close the template or category record.
If a user does not have permission to view a category, the user cannot access any of the templates contained in that category from the Select A Record Template dialog, even if the user has permission to use those templates.
Creating Templates for Multiple Users
Aptify recommends that an administrator follow the process outlined below to create templates for system users:
- Follow the standard procedure for creating a new template that is available to all users. This process is described in the Creating Record Templates. For information on view templates, see the Creating a View Template.
- Aptify automatically generates the Object XML data (and the User Flag and User Value data, if applicable) in the correct format that defines the default fields for the template.
- Follow the steps in Specifying User Access for a Record Template or Category if you want to limit access to this template to a specified set of users.
Editing a Record Template Using the Save Template Dialog
This procedure describes how to edit a record template. See Editing a View Template for information on how to edit a view template.
- Load an existing template from the Select A Record Template dialog.
- Depending on your user preferences, the Select A Template dialog may open automatically. Otherwise, open a new record in a service and select New From Template... from the Data Control Bar's right-click menu.
- Modify the template as necessary.
- Right-click the record's Data Control Bar and select Save As Template... from the pop-up menu to open the Save Template dialog.
- The Update Template dialog appears with the name of the template and template category already populated. These fields are disabled, indicating that an existing template is being modified. If you want to save a record template as a new template, select the New Template option.
- The Update Template dialog appears with the name of the template and template category already populated. These fields are disabled, indicating that an existing template is being modified. If you want to save a record template as a new template, select the New Template option.
- Enter any information about the modification in the Description field, if desired.
-
Select the template's category from the Category drop-down list
The system will create a new template if you fail to specify the exact Name and Category for the existing template that you are attempting to edit.
- Click OK.
- Assuming that you entered the correct name and category, Aptify displays a message box indicating that this template already exists.
- Click Yes to update the existing template with your new changes.
Editing a Record Template Using the Entity Record Templates Record
If necessary, an administrator can also change a Record Template by modifying the corresponding Entity Record Templates record.
Each time a user saves a new template, Aptify automatically creates an Entity Record Templates record. This record stores the field values you specified in XML format (in the Object XML field).
If necessary, you can manually scroll through the Object XML field and modify one or more field values.
Keep in mind that when Aptify creates a template, it captures the record values as they current appear on the form. Therefore, in some cases, the template may carry over a value that was not intended.
For example, consider a Date/Time field, such as a Topic Code's Start Date, that has default value of GETDATE() defined in its Entity Fields record. Each time a user opens a new Topic Codes record, the system automatically populates this field with the current date.
However, if you create a Topic Codes template and leave the Start Date at its default setting, the template will subsequently load using that date rather than the current date (in the example shown below, the template stores the StartDate using the date it was created).
To reinstate the current date functionality for this field, you can modify the Object XML for the record template to either change the Start Date field's value to GETDATE() or blank out the template's Start Date (in this case, the template will not populate the Start Date and it will use the entity field's default setting, that is the current date).
See About the Entity Record Templates Form for more information.
Administering Scripts
Aptify includes a scripting engine that executes user-defined scripts in several areas within the product. The system centralizes these scripts in a Scripts service. The standard Aptify installation supports scripting in the following entities:
- Message Parts (see Configuring Message Parts)
- Message Templates (see Creating Message Templates)
- Rule-based Process Flow Steps (see Managing Process Pipelines)
- Field Validation (see Validation Tab)
- Event Definitions (see Managing Process Pipelines)
- Price Rules (see Establishing Pricing Rules)
- Alert Types (see Creating Alert Types)
Each of these entities has an embedded link to the Scripts entity. (See Creating Embedded Objects for more information.) Also, the Code Script control appears on the form for each of these entities. This control displays the user-defined code in standard VB.NET scripting format using colors and indenting to identify keywords and other code elements, as shown below.
Note that the Database Objects service does not store SQL text in the Scripts service even though it uses the Code Script control.
This topic covers the following sub-topics:
- About the Scripting Infrastructure
- About the Code Script Control Characteristics
- About the Script Naming Conventions
- Adding Scripting to a New Entity
About the Scripting Infrastructure
Aptify includes a scripting implementation that centralizes all user-defined scripts into a central location. This functionality uses the following services:
-
Script Languages: This service stores information about the supported coding languages for writing scripts in Aptify. The standard installation of Aptify supports three scripting languages:
- VB.NET: Used by Entity Fields validation, Event Definition Filter Triggers, VBScript-based Process Flow Step Rules, and plain text Message Parts.
- SQL: Used by SQL-based Process Flow Step rules.
- HTML: Used by HTML Message Parts and by HTML and plain text Message Templates.
-
Script Types: This service stores information about the functional areas that support user-defined scripts and the objects that a script of a particular type can reference. The standard installation of Aptify includes four script types:
- Messaging: This script type applies to the Message Parts and Message Templates entities.
- Process Pipeline: This script type applies to rule-based Process Flow Steps.
- Field: This script type applies to Entity Field validation.
- Events: This script type applies to the Filter Trigger for Event Definitions.
- Alerts: This script type applies to Alert notifications that can appear in the Data Control Bar.
- Pricing Rules: This script type applies to scripts written to determine a product's price for a particular customer/member.
- Scripts: This service stores the text of each user-defined script. It also stores a Script Name, its language, and its type.
About the Code Script Control Characteristics
The Code Script control that appears on a form is linked to the embedded ScriptID in an entity (note that this does not apply to the Database Objects service).
When you enter a script in the control and save a record, Aptify automatically creates a Scripts record and populates the following fields:
- Script Language: The Code Script control on an entity's form is hard coded with a specific ScriptLanguageID. This selection flows down to the Scripts record.
- Script Type: The Code Script control on an entity's form is hard coded with a specific ScriptTypeID. This selection flows down to the Scripts record.
-
Script Name: The system automatically generates a name for a script based on information from the record that embeds that script using the following format:
-
Message Templates: [Entity Name].[Field Name]([Record's Name].SystemID=[Record's DefaultMessageSystemID],SourceID=[Record's DefaultMessageSourceID])
- E.g.: Message Templates.HTMLScriptID(Address Verification.SystemID=5,SourceID=2)
-
Message Parts: [Entity Name].[Field Name]([Record's Name].CategoryID=[Record's CategoryID])
- E.g.: Message Parts.HTMLScriptID(Two Line Address Block.CategoryID=7)
-
All Other Script Types: [Entity Name].[Field Name]([Record's Name])
- E.g.: Process Flow Steps.RuleTextScriptID(Show "Pending")
- For top-level Entities, the Record's Name is the value stored in the Name field.
- For Sub-Types, the Record's Name also includes the value of the Name fields throughout the parent hierarchy, separated by the period (.). For example, a field validation script for the Calculation Type field in the Shipment Types entity has this script name: EntityFields.ValidationScriptID(Shipment Types.CalculationType)
-
Message Templates: [Entity Name].[Field Name]([Record's Name].SystemID=[Record's DefaultMessageSystemID],SourceID=[Record's DefaultMessageSourceID])
- Script Text: The user-defined script is stored in this field.
The Code Script control includes a toolbar with two icons. When writing a script, you can click one of these icons to see the references and intrinsic objects that are available for use in the script and to see relevant examples (if available). The information that is displayed when you click one of these icons flows down from the appropriate Script Types record.
The icons are as follows, from left to right:
-
Available Objects: Click this icon to display the intrinsic objects available for this type of script (see figure below). The objects flow down from the applicable Script Type's Available Objects tab. You can add an object to your script by placing the cursor in the desired location before clicking the Available Objects icon. Then, double-click an object or select an object and click Copy to add it to the specified location within the script. Note that double-clicking an object or clicking Copy closes the Available Objects dialog.
-
All References: Click this icon to display the list of references available for a script of this type. The references are separated into two categories: GAC Reference and Repository Reference (as shown in figure below). GAC References are objects in the Windows Global Assembly Cache. Repository References are objects in the Aptify Object Repository. The available references flow down from the applicable Script Type's Repository References and GAC References tabs.
-
Example Script: Click this icon to display any sample scripts provided for this script type. You can copy all or a portion of a sample script by placing the cursor in the desired location before clicking the Example Script icon. Then, highlight the text you want to copy to your script and click Copy. The Examples dialog closes and the text is added to the specified location within the script.
- The examples flow from a Script Type's Languages tab. For each Script Type's Languages sub-type record, you can specify a supported scripting language and provide sample code that will appear when a user clicks the Example Script icon.
- The Example Script icon will not appear if there is no sample code provided in a Script Type's Languages sub-type record.
About the Script Naming Conventions
The Aptify naming convention for Scripts records is designed so that each record has a unique name. The following is an overview of the naming convention used for Scripts records:
-
Message Templates: [Entity Name]. [Field Name] ([Record's Name].SystemID=[Record's DefaultMessageSystemID],SourceID=[Record's DefaultMessageSourceID])
- E.g. Message Templates.HTMLScriptID(Address Verification.SystemID=5,SourceID=2)
-
Message Parts: [Entity Name].[Field Name]([Record's Name].CategoryID=[Record's CategoryID])
- E.g.: Message Parts.HTMLScriptID(Two Line Address Block.CategoryID=7)
-
All Other Script Types: [Entity Name].[Field Name]([Record's Name])
- E.g.: Process Flow Steps.RuleTextScriptID(Show "Pending")
- For top-level Entities, the Record's Name is the value stored in the Name field.
- For Sub-Types, the Record's Name also includes the value of the Name fields throughout the parent hierarchy, separated by the period (.). For example, a field validation script for the Calculation Type field in the Shipment Types entity has this script name: EntityFields.ValidationScriptID(Shipment Types.CalculationType).
- E.g.: Process Flow Steps.RuleTextScriptID(Show "Pending")
Adding Scripting to a New Entity
You can add scripting capabilities to a new entity by following these steps:
- Add an embedded link to the Scripts entity's ID field in your new entity.
- See Creating Embedded Objects for information on how to create an embedded link.
- Use the Visual Designer to remove the fields from the Scripts entity from your generated form.
- See Using the Visual Designer to Modify Existing Fields for more information on deleting field parts from a form.
- Use the Visual Designer to add the Code Script control to your entity's form.
- See Using the Visual Designer to Add New Fields or Controls and About the Visual Designer Code Script Control for more information.
- Create business logic that determines when and how to execute the script stored in your entity's records.
- Aptify expects that a developer will complete this step; additional details are beyond the scope of this topic. Refer to the Aptify Software Development Kit (SDK) or consider taking an Aptify Developer training class for information on developer-related topics.
Administering the Viewing System
This topic provides information in the following sub-topics on the administrative functions related to the Viewing system:
- Using the Views Service
- About the View Types
- Enabling View Scheduling
- About View Scheduling and Email Distribution
- Disabling Access to View Scheduling
- Creating a View Prompt Query
Using the Views Service
Aptify provides many applications that users may add to their Aptify application folder. After adding an application to the Aptify application folder, users normally create views from the services within the applications to access data. Every view a user creates is stored in a separate Views entity that system administrators may access. The Views service allows system administrators to create or edit a view on behalf of any other registered user from a central location. The Views service is found in the Aptify Framework Administration application.
The system administrator may want to create a configured view for a given service for two or more users. The Views service allows the administrator to generate the view without having to walk the users through the necessary steps to create it on their local machines. Also, the administrator can add the view to a user's folder by specifying the appropriate folder in the View Category field.
Most views are created by the users themselves. The Views service is provided primarily for troubleshooting. However, you can choose to give some power users access to the Views entity so they can create and/or manage all views directly from the entity. The Views entity supports ViewAdministratorGroups attribute which provides access to all views to specified Groups. View Administrators have the ability to create, update and delete Views where the user is not the owner of the View.
Follow these steps to configure the ViewsAdministratorGroups entity:
- Open or create a view within the Entities service that includes the Views entity.
- Double-click the Views entry to open the entity.
- Click the Configuration tab.
- Click the Attributes sub-tab.
- Double-click the ViewAdministratorGroups entry.
- Enter the list of Groups whose members you want to make View Administrators in the Value field. Keep in mind the following:
- Use the pipe symbol (|) to separate Group names in the Value field.
- The Value field contains the Administrators group by default.
- The sa user is a View Administrator by default.
- Click OK and Save and Close the entity record.
An administrator can limit the number of records that appear in a list view. See Managing the Recordset Query Limitation for details.
About the View Types
A standard Aptify installation supports the following view types:
- List Views
- Calendar Views
- Chart Views
- Pivot Table Views
- Pivot Grid Views
- Map Views
- Gantt Views
Each of these view types has a View Types record, as shown below for calendar views.
The General and Filters tab on the View Types form display a series of check boxes that correspond to the functionality that is available within the Aptify viewing system. By default, only the features supported by a particular view type are selected.
Note that you should not enable any feature for a particular view type that is not checked by default. Your users will encounter difficulty configuring views if they attempt to configure a view to use an unsupported feature.
However, if you want to make a particular supported feature unavailable to your users, you can clear the selection from the appropriate check box and save the record. For example, if you want to prevent users from using the Auto Refresh feature, clear the the Show Auto Refresh check box and save the record. In this case, the Auto Refresh tab would no longer appear on the View Properties tab for views that use this particular view type.
See About the View Types Form for more information on the form. Also, for information on how to use each view type, see Using the Viewing System.
Enabling View Scheduling
With Aptify, a user can configure a list, chart, or calendar view to run automatically on a specific schedule to generate a report or file based on the current view results. This features uses Aptify's Application Server and Scheduled Task functionality to execute a view at the appropriate time without requiring any user intervention.
Your Aptify installation must include one or more Application Servers to use View Scheduling. See Managing Scheduled Tasks more for information.
The following is an overview of the process:
- Within the View Properties dialog's Scheduling tab, a user enables view scheduling for a particular view and specifies the view's execution schedule and output mode.
- See the Scheduling a View to Run Automatically for information on how to use the Views dialog to schedule a view.
- When the user saves the view, Aptify creates a View Auto-Scheduler Scheduled Tasks record that contains the information specified by the user.
- This Scheduled Task uses the Remote Scheduler service (since not all users will have the appropriate permissions to create Windows Scheduled Tasks on the Application Server).
- The Remote Scheduler service creates a Process Flow Runs record to change the Scheduled Task's service from Remote Scheduler to Windows Scheduler.
- The Application Server executes the Process Flow Run and updates the Scheduled Task's service to Windows Scheduler. This generates a Windows Scheduled Task on the Application Server that will execute the view and generate an output document at the appropriate dates and times as specified by the user.
- Since the Application Server's user account modifies the Scheduled Tasks record, that user account, which should already have the necessary permissions, creates the Windows Scheduled Task in lieu of the user who originally saved the view.
- At the specified date and time, the Scheduled Task creates a Process Flow Runs record that fires the Execute View with No UI process flow using the input values provided by the user.
- The assigned Application Server executes the Process Flow Runs record, generates the view output document as specified by the user, and sends the document via email to the list of recipients (depending on the view's configuration).
- See About View Scheduling and Email Distribution for important information.
To support this functionality, an administrator must configure the View Scheduling default options in the Views entity. An administrator also needs to install the network printers on the Application Server used by view scheduling to support the Print output option. Follow these steps to enable support for view scheduling:
- Open the Application Servers record for the Application Server you intend to use for view scheduling.
- Click the Account Information tab.
- If not already specified, enter a Default Job Account Name and Default Job Account Password.
- These fields identify the default user account to run Windows Scheduled Tasks for this Application Server.
- This default account runs all Scheduled Tasks generated by view scheduling on this Application Server.
- The Default Job Account Password is encrypted using the Generic Entity Encryption Key. By default, the sa user and members of the supplied Accounting, Administrators, and/or Users groups have access to this key. Only users who have access to the key can enter a value in this field. Also, any user who will use View Scheduling also needs access rights to this key in order save the scheduled view's corresponding Scheduled Tasks record. Depending on the security model that your organization has implemented, you may want to create a new key to encrypt this field and allow only designated users access to that key. This is the recommended approach. Follow these steps:
- Log in to Aptify as an administrative user.
- Create a new Security Key to encrypt the Default Job Account Password, grant access to the appropriate users for this key, and then update the Default Job Account Password field in the Application Servers entity to use this new key.
- Update the Job Account Password field in the Scheduled Tasks entity to use this key, too. See Creating a Scheduled Task for more information on this field.
- See Managing Field Level Encryption for information on using Field Level Encryption.
- Users who will use view scheduling also need access to the Security Key that encrypts the Scheduled Tasks entity's Job Account Password field. See Creating a Scheduled Task for more information on this field.
- Save and close the record.
- Open the Views record from the Entities service.
- The Entities service is found under the Aptify Framework Administration application.
- Click the Configuration > Attributes tab.
- Configure the following attributes, as necessary:
- ScheduledViewProcessFlow: This is the name of the Process Flow that handles auto-execution of views on a scheduled basis. By default, this attribute is set to Execute View with No UI, which is the Process Flow provided by Aptify. If you have created your own Process Flow to handle View Scheduling, edit this attribute to use that Process Flow's name.
- ScheduledViewScheduledTaskService: This is the name of the Scheduled Task Service that will be used to save Scheduled Tasks records generated by view scheduling. By default, this attribute is set to Remote Scheduler, which is the Scheduled Task Service that allows users without elevated permissions to save Scheduled Tasks records. After the initial save, the Remote Scheduler creates a Process Flow Runs record to use the Application Server to convert the Scheduled Task Service to the standard Windows Scheduler and consequently create the Windows Scheduled Task on the Application Server.
- ScheduledViewScheduledTaskCategory: This is the name of the Scheduled Task Category that will be assigned to all Scheduled Tasks created by View Scheduling. By default, this attribute is set to Scheduled Views. If you have created your own Scheduled Task Categories record and want to use it as the default category for View Scheduling, enter that category's name as the attribute value.
-
ScheduledViewApplicationServer: This is the name of the Application Server on your network that will execute the views based on the information stored in the Scheduled Tasks record. You must enter the name of an installed Application Server in order to support View Scheduling. This Application Server must have a default Job Account User Name and Password specified.Info: When enabling View Scheduling, you only need to specify an Application Server's name as the value for the ScheduledViewApplicationServer attribute. You can leave the other attributes at their default setting.
- Save and close the Views entity record.
- Close and reopen the Aptify client to ensure that any changes you made successfully flow down to the Views dialog.
- The attribute values you specify in the Views entity flow down to the Advanced Scheduling sub-tab of the Views dialog (shown in the figure below). Advanced users can modify these default settings as needed on a view-by-view basis when setting up a view's schedule. The four fields on this tab correspond to the four attributes listed above.
- Administrators who have the necessary privileges to create Windows Scheduled Tasks on the Application Server, can clear the Use Remote Scheduler option to bypass the Remote Scheduler functionality and use the Windows Scheduler option to create the Windows Scheduled Task immediately.
- Log in to the Application Server you specified for the ScheduledViewApplicationServer attribute using the account that is running the Aptify Asynchronous Processor service.
-
Confirm that the network printers are installed on the Application Server for the user account that is running the Aptify Asynchronous Processor service. If not, install them.
When configuring a view's Scheduling tab, a user can specify that the view results be printed using a specified printer. The list of printers available to the user are the printers installed on the user's local computer. However, the actual print job is initiated by the Application Server. Therefore, the Application Server must have the same set of network printers installed for the Application Server user as all of the clients to ensure that a client's view will be successfully printed.
-
Confirm that the user account that is running the Aptify Asynchronous Processor service has read/write access to the same network locations as your users. If not, provide the account with the necessary access.
When configuring a view's Scheduling tab, a user can specify a network location to save the view results to a file. This option is required for the File and Email output modes. However, since the file will actually be created by the Application Server user, that user must have read/write access to the same network resources as all of the clients to ensure that a client's view will be successfully saved to a file.
- Log out of the Application Server.
About View Scheduling and Email Distribution
- If your users want to send view results to email recipients automatically, Aptify strongly recommends that you use an SMTP-based messaging system, such as the SMTP-based Dot Net Mail or Dot Net Mail SMTP Client system, rather than Outlook Mail.
- If a user decides to use Outlook Mail to send view results, note that messages will be sent from the Application Server user's Outlook account and not from the user who originally configured the view. Also, Microsoft Outlook may require that no user be logged into the Application Server in order to successfully generate and send bulk messages at the appointed time. Finally, you may need to reduce Outlook's security settings to allow messages to be sent from Aptify without user intervention.
- The Application Server user is the trusted user account who is running the asynchronous processor service. See Configuring an Application Server for details. This user account must have an active Outlook account to send Outlook messages using Application Server.
- If a user decides to use Outlook Mail to send view results, note that messages will be sent from the Application Server user's Outlook account and not from the user who originally configured the view. Also, Microsoft Outlook may require that no user be logged into the Application Server in order to successfully generate and send bulk messages at the appointed time. Finally, you may need to reduce Outlook's security settings to allow messages to be sent from Aptify without user intervention.
- When setting up an SMTP server that will send view results as email attachments, keep in mind that the message size limit must be large enough to support the email attachments.
- For example, Microsoft's SMTP Virtual Server has a default message size limit of 2040 KB. However, the size of a bitmap version of a chart view (which is what is attached to an email) may exceed this limit. In this case, the message delivery will fail at the scheduled date and time.
- If using Microsoft's SMTP Virtual Server, follow these steps to configure the message size limit:
- Open the Internet Information Services (IIS) Manager.
- Right-click the SMTP Virtual Server in the console tree and select Properties from the pop-up menu.
- Click the Messages tab.
- Modify the Limit message size to (KB) field as necessary.
- Restart Internet Services on your computer in order for the new message size limit to take effect.
- When this functionality is enabled, Aptify always generates and emails reports for views, even when the view contains no data. In Aptify, administrators have the ability to control whether an email is sent when a view contains no data. The following metadata items allow for control of generation of reports for dataless views:
-
ViewControl.ScheduleDialogControl.DoSDCLocalization.SendMailForBlankViewAsWell Culture String Record
- Base String: Send Mail For Blank View As Well
- Category: Basic
-
SendMailForBlankViewAsWell field in the Views entity
- DisplayName: Send Mail For Blank View As Well
- Description: Send Mail For Blank View As Well
- SQLDataType: bit
- InTable: 1
- Updateable: 1
- Type: 0
- DefaultValue: 1
-
SendMailForBlankViewAsWell input property in the Execute View with No UI process component
- Description: If this is true, the email is sent with blank attachment file. If this is false, an email is not sent.
- Type: Integer
- IsRequired: 0
-
SendMailForBlankViewAsWell input property in the Execute View with No UI process flow
- Description: If this is true, the email is sent with blank attachment file. If this is false, an email is not sent.
- Type: String
- IsRequired: 0
-
SendMailForBlankViewAsWell input property record in the Execute View with No UI process flow
- SourceType: Context Object
- Source : SendMailForBlankViewAsWell
-
ViewControl.ScheduleDialogControl.DoSDCLocalization.SendMailForBlankViewAsWell Culture String Record
Disabling Access to View Scheduling
If your organization does not want to support view scheduling, you can disable user access to the View Scheduling tab. Simply clear the Show Schedule option on the View Types record for all view types. See About the View Types for details.
Creating a View Prompt Query
In Aptify, administrators are able to use the View Prompt Query service to create view prompt queries that can be used to create views that contain prompts with dynamic content. The view prompt queries contain the SQL necessary to specify the content type that is displayed in the prompt list when the view is run. Users specify a view prompt query when creating a drop down (SQL query) prompt view. See Creating a Drop Down (SQL Query) Prompt View for more information about creating and running these views.
There are no default view prompt queries available in Aptify. Administrators create the view prompt queries required to support the ability to create and run drop down (SQL query) views,
Perform the following procedure to create a view prompt query:
- Log in to Aptify with an account with administrative access.
- In the Web Services application, open the View Prompt Query service.
- Open a new View Prompt Query record.
- In the Name field, enter a name for the view prompt query.
- In the Service Data Object ID field, specify the service data object that contains the SQL to identify the desired content type.
- See Creating a Service Data Object for more information about creating a new service data object.
-
For example, to get a list of names from the database to populate the prompt list, enter the following in the SQL field:
select firstlast from vwpersons
- In the Description field, enter a description of the view prompt query (optional).
- Save and close the View Prompt Query record.
Installing the Desktop Version of the Aptify Add-in for Microsoft Outlook
This is the Desktop Version of the Outlook Add-in
If your users are accessing Aptify through the web interface and are using a web-based version of Outlook, for example Outlook.com (formerly known as Hotmail) or Outlook 365 or a desktop-based version of Outlook (with Microsoft Exchange 2013 or higher), you will want to review Installing the Web Version of the Aptify Add-in for Microsoft Outlook. If your users are accessing Aptify through the desktop interface, you will want to review this topic.
For information about using this version of the add-in, see Using the Desktop Version of the Aptify Outlook Add-In for more details.
Aptify includes an add-in plugin for Microsoft Outlook (versions 2007, 2010, 2013, and 2016) that lets users create Aptify Persons and Contact Logs records directly within Outlook without having to access an open Aptify session. You can also configure the add-plugin to automatically create contact logs when a particular account receives or sends an email, which is useful for automated mailboxes.
Outlook Add-in Installer
The add-in has a separate installation program. You can find the latest version of this installer (which includes the version that supports Outlook 2016), in your organization's Aptify FTP folder (typically under the Version_50 folder). The installer is called OutlookAptifyAddinSetup.zip.
To install the Aptify add-in, refer to the topics below:
- Installing the Aptify Outlook Add-in
- Copying and Configuring the Outlook Add-in Config File
- Verifying the Local Aptify Outlook Add-in Installation
Installing the Aptify Outlook Add-in
- Locate the AptifyOutlookAddIn installer.
- You can find the installer in your organization's Aptify FTP folder (typically under the Version_60 folder). The installer name is OutlookAptifyAddinSetup.zip.
- You can also find a copy of the installer in the Aptify Database distribution folder under the Utilities sub-folder.
- Select the appropriate installed for your version of Outlook. Options are:
- Outlook2016AptifyIntegrationSetup: for 64-bit versions of Outlook 2016 and Outlook 2013
- Outlook2013AptifyIntegrationSetup: for 32-bit versions of Outlook 2016 and Outlook 2013
- Outlook2007_2010AptifyIntegrationSetup: for Outlook 2010 and 2007
- Double-click the appropriate AptifyOutlookAddIn to launch the installer.
- Once the Publisher has been verified, click Install to install the add-in.
- Click Close and confirm successful installation of the AptifyOutlookAddIn.
Once the feature is installed, an Aptify drop-down menu will be available via the Add-Ins tab on the Outlook Ribbon bar (and through Outlook's right-click context menu for Outlook 2010 and 2007). With a properly configured OutlookAddinConfiguration file, when opening Outlook, the add-in is logged into Aptify automatically as shown below (unless Outlook is configured to disable certain or all add-ins). See Copying and Configuring the OutlookAddinConfiguration Config File for configuring the Aptify Outlook Add-In for use.
Config File Must Be Configured and In Appropriate Location
The add-in will not work as expected until the OutlookAddinConfiguration file is configured and copied to the local Aptify installation (and in some cases, it needs to be copied to the C: drive as well). See Copying and Configuring the OutlookAddinConfiguration Config File for configuring the Aptify Outlook Add-In for use.
Copying and Configuring the Outlook Add-in Config File
Once the add-in has been installed, you need to copy the OutlookAddinConfiguration XML file to the baseline path of your local Aptify installation and then configure it appropriately.
Follow the steps below to copy and configure the OutlookAddinConfiguration file:
- Locate the AptifyOutlookAddIn config file.
- You can find a copy of the file in the appropriate sub-folder (based on your Outlook version) in the OutlookAptifyAddinSetup distribution file,
- You can also find a copy of the file in the Aptify Database setup distribution folder under the Utilities > OutlookAptifyIntegrationSetUp sub-folder.
-
Copy the file to the baseline path of the Aptify client on the local machine.
Concerning Multiple Instances of Aptify
The Aptify Outlook Add-In assumes that the configuration file is placed in the baseline path of the Aptify client on the local machine, which is, by default, the instance that was last installed. If you have installed more than one instance of the Aptify client on the current machine, you should verify which instance is specified as the default path and modify as needed. You may also find you need to copy the config file to another location (like the root of the C: drive). See Verifying the Local Aptify Installation for more information. -
Right-click and select edit to modify the attributes as needed, as shown below. Below is a description of each attribute:
-
- AptifyServer: Specifies the server in which the user is connecting to the Aptify database.
-
- AptifyUserDatabase: Specifies the database that stores record data. By default, this value is set to Aptify.
-
- AptifyEntitiesDatabase: Specifies the database that contains the entity definitions. By default, this value is set to Aptify.
-
-
AptifyLoginTrusted: Specifies whether or not Windows Integrated Security (or a trusted connection) is used. By default, this option is set to True and the connection between outlook that the Aptify database is established via a trusted connection.
Trusted User Account Recommendations
Aptify recommends uses a trusted account to establish a connection between Outlook and the Aptify database.
-
-
- User: Can be used to specify a username when AptifyLoginTrusted is set to False.
-
- Password: Can be used to specify a password when AptifyLoginTrusted is set to False.
-
FolderPath: When ContactLogSync is set to True, the full path to the Outlook mail folder in which contact logs will automatically be created.
Must Specify Full Path to Mail Folder
The full path to the mail folder is the name of the folder preceded by the E-Mail Delivery Location found under Outlook's Accounting Settings > E-mail tab. For example, Mailbox - User Name\Inbox\NameofFolder OR testuser@domain.com\Inbox\NameofFolder.
-
- ContactLogSync: When set to True, contact logs are created automatically for messages that are found in the Outlook mail folder location specified with the FolderPath attribute. When set to False, contact logs are not created automatically and the manual option is enabled.
- ContactSync: When set to True, new or updated contacts that do not exist in Aptify are automatically created as Persons records or existing Persons records are updated if applicable. When set to False, a user can create and update Persons records manually by using the Create Aptify Person or Show Person in Aptify options.
- TypeID: Specifies the record ID of type of contact (Contact Log Type). By default, this value is 3, which is E-mail in a standard Aptify installation.
- CategoryID: Specifies the record ID of the Contact Log Category. By default, this value is 1, which is Sales in a standard Aptify installation.
- CreateContactLogForSentItem: When set to True, contact logs are created for all outgoing emails. When set to False, no Contact Logs records are created for outgoing messages.
Verifying the Local Aptify Add-in Installation
Note
The below steps are typically only required if there is more than one instance installed on the current machine. However, you can also use the below steps to troubleshoot connection issue.
Once the add-in has been installed, you need to configure and copy the OutlookAddinConfiguration XML file to the baseline path of your local Aptify installation. By default, the baseline path is the last instance of Aptify installed on your local machine, however, if you have multiple Aptify instances, you should verify which instance is specified as the default path and modify as needed.
To locate your baseline path a user or administrator can review the following registry key path in the Registry Editor on the local machine:
-
64 bit hardware:
- HKEY_LOCAL_MACHINE\SOFTWARE\Wow6432Node\Aptify\LatestInstallDirectory
-
32 bit hardware:
- HKEY_LOCAL_MACHINE\SOFTWARE\Aptify\LatestInstallDirectory
If the value specified for LatestInstallDirectory is not the path in which you plan to interact with your Aptify client, you can modify the value by:
- Open the Registry Editor on the local machine (regedit)
- Double-clicking LatestInstallDIrectory.
- Specifying the appropriate path.
- Click OK to save the changes.
If Outlook is Still Not Connecting to Aptify....
If after verifying the configuration and location of the location OutlookAddinConfiguration XML file, Outlook still does not connect to Aptify. Review the Application Event Logs on the current machine. You may find an entry that indicates that the add-in is looking for the config file in a different location (like the root of the C: drive). Try copying the file to the location specified. If that does not work, contact Aptify Technical Support for further assistance.
Installing the Web Version of the Aptify Add-in for Microsoft Outlook
This is the Web Version of the Outlook Add-in
If your users are accessing Aptify through the desktop interface, you will want to review the Installing the Desktop Version of the Aptify Add-in for Microsoft Outlook. If your users are accessing Aptify through the web interface and are using a web-based version of Outlook, for example Outlook.com (formerly known as Hotmail) or Outlook 365 or a desktop-based version of Outlook (with Microsoft Exchange 2013 or higher), you will want to review this topic.
For information about using this add-in, see Using the Web Version of the Aptify Outlook Add-In for more details.
Aptify includes an add-in setup for Microsoft Outlook.com and Office 365 that lets users create Contact Log records directly within Outlook without having to access an open Aptify session. You can also search for (and open as needed) Persons, Companies, and Committee members to add to an email. Once the email is sent, a Contact log is automatically created with the appropriate links.
Aptify Requirements and Where to Find the Outlook Add-in Installer
This add-in requires Aptify 5.5.5 and higher. It is a separate Windows installer that must be installed on your server where Aptify SOA is installed. The add-in can be found in the Include > WebOutlookAddin folder of the Aptify_555_Web distribution file. The installer name is SetupOutlookAddin.
To install the Aptify add-in, refer to the topics below:
Installing the Aptify Outlook Add-in
- Locate the AptifyOutlookAddIn installer.
- The add-in can be found in the Utilties > WebOutlookAddin folder of the Aptify_555_Web distribution file. The installer name is SetupOutlookAddin.
- The add-in can be found in the Utilties > WebOutlookAddin folder of the Aptify_555_Web distribution file. The installer name is SetupOutlookAddin.
- Copy the installer to your web server where Aptify web and Aptify web services is installed.
- Double-click the SetupOutlookAddin to launch the installer.
- Click Next on the welcome screen.
-
Select the location where you want to Outlook Add-in to be installed or click Next to use the default location.
- The default location is c:\inetpub\wwwroot\OutlookAddIn\
- The default location is c:\inetpub\wwwroot\OutlookAddIn\
-
Specify the URL for the Outlook Add-In by replacing <ServerName> with the name of your web server.
- The folder specified should be the same as the previous step.
-
Specify the URL for your Aptify website.
- If using the default location, simply replace <ServerName> with the name of your web server.
-
Specify the URL for your Aptify services site (SOA).
- If using the default location, simply replace <ServerName> with the name of your web server.
- If using the default location, simply replace <ServerName> with the name of your web server.
- Click Next.
- Click Install.
- Click Finish when the setup is complete.
Copying and Configuring the Outlook Add-in
Once the setup has been installed, users will need to configure their outlook instance using the AptifyOutlook XML file generated by installing the Outlook Add-in on your web server.
The following steps described how to copy and configure the add-in with Outlook.com. See the help files for your version of Outlook for information on how to install an add-in from a file.
- Navigate to the locations where the add-in was installed, see Step 5 of the previous step.
- The default location is c:\inetpub\wwwroot\OutlookAddIn\
-
Copy the AptifyOutlook XML file to your local machine (or a location on the network where your Outlook users can access it).
-
Log into Outlook.com, click the Settings option in the top-right corner and then select Manage Integrations.
-
Select Click here to add a customer add-in.
-
Select Add from file...
-
Navigate to and select the AptifyOutlook XML file.
-
Review the Warning dialog and then click Install if you wish to continue.
-
Once installed, the add-in will appear in your list of add-ins as Aptify.
-
To remove the add-in, navigate to (or use the Search field) the Aptify add-in and select the Uninstall option.
-
Comments
Please sign in to leave a comment.